Have you peeled the plastic off your shiny new Galaxy Note 9 yet? As you start setting up your new Samsung smartphone, we’ve rounded up 10 settings you may want to tweak to get the best experience.
- Get the best screen resolution
- Change the navigation bar
- Customize the S Pen
- Turn on advanced features like Smart Stay, Finger Sensor Gestures, SOS messages
- Hide apps in the App Drawer
- Turn off Bixby Home
- Use Volume Keys for media, toggle system sounds
- Make the Edge Panel transparent
- See all your notifications, schedule the blue-light filter
- Personalize the lock screen clock
You can check out our Galaxy Note 9 review for our impressions, and check out our picks for best Note 9 cases to add some protection to that all-glass phone.
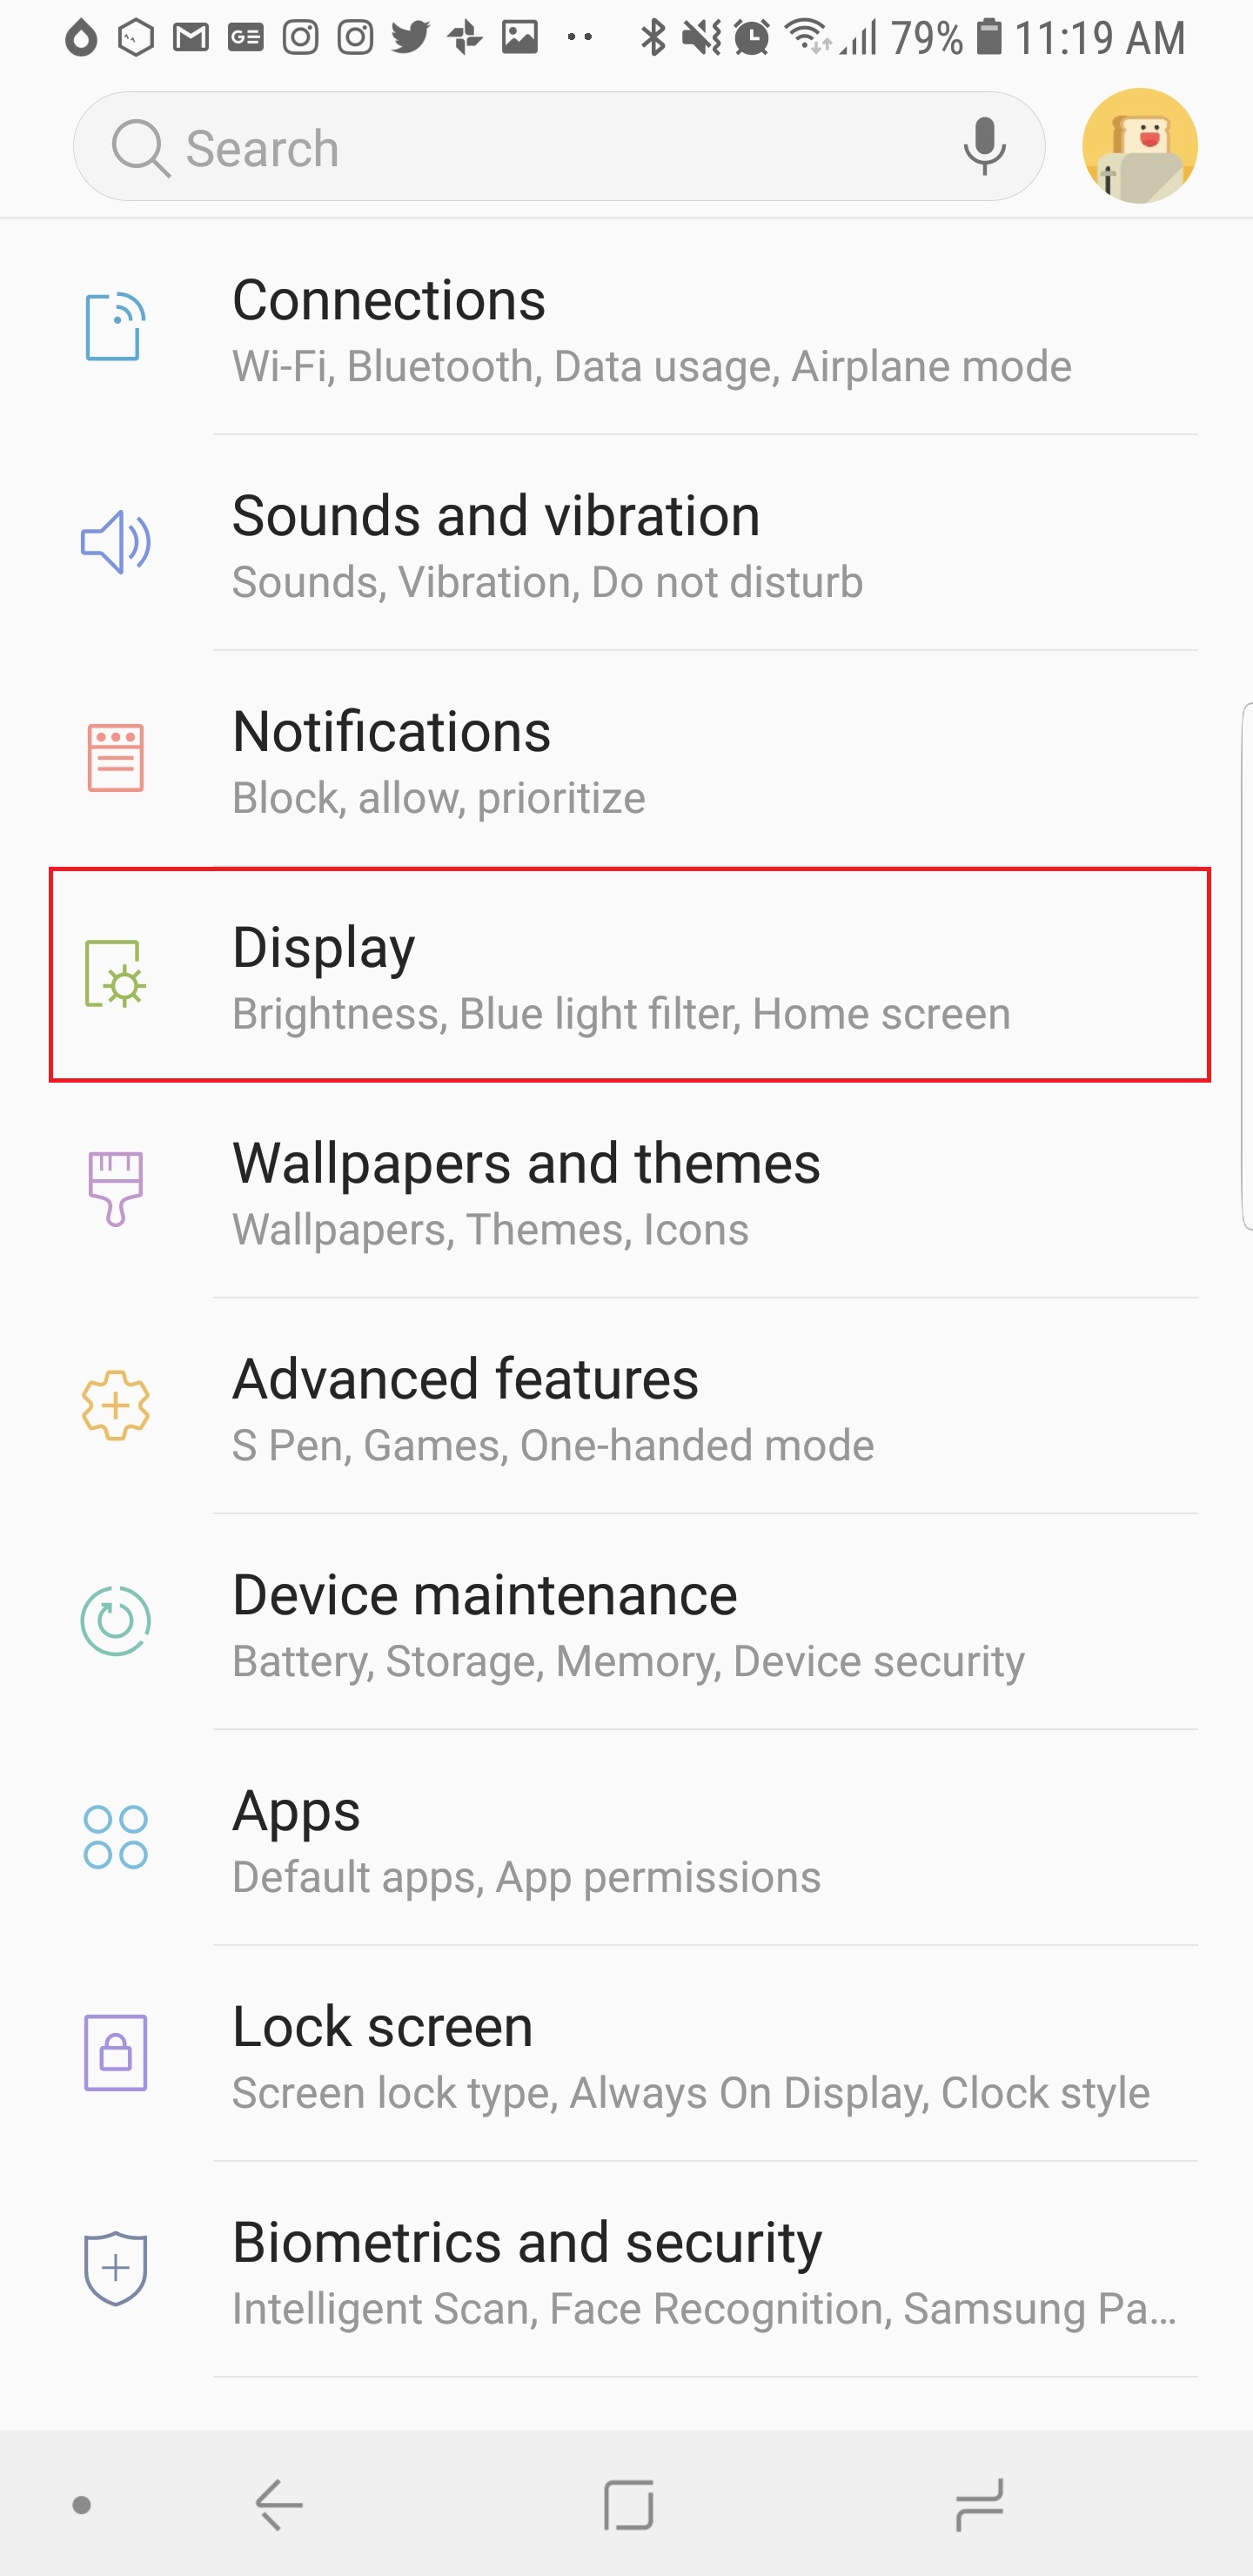
Get the best screen resolution
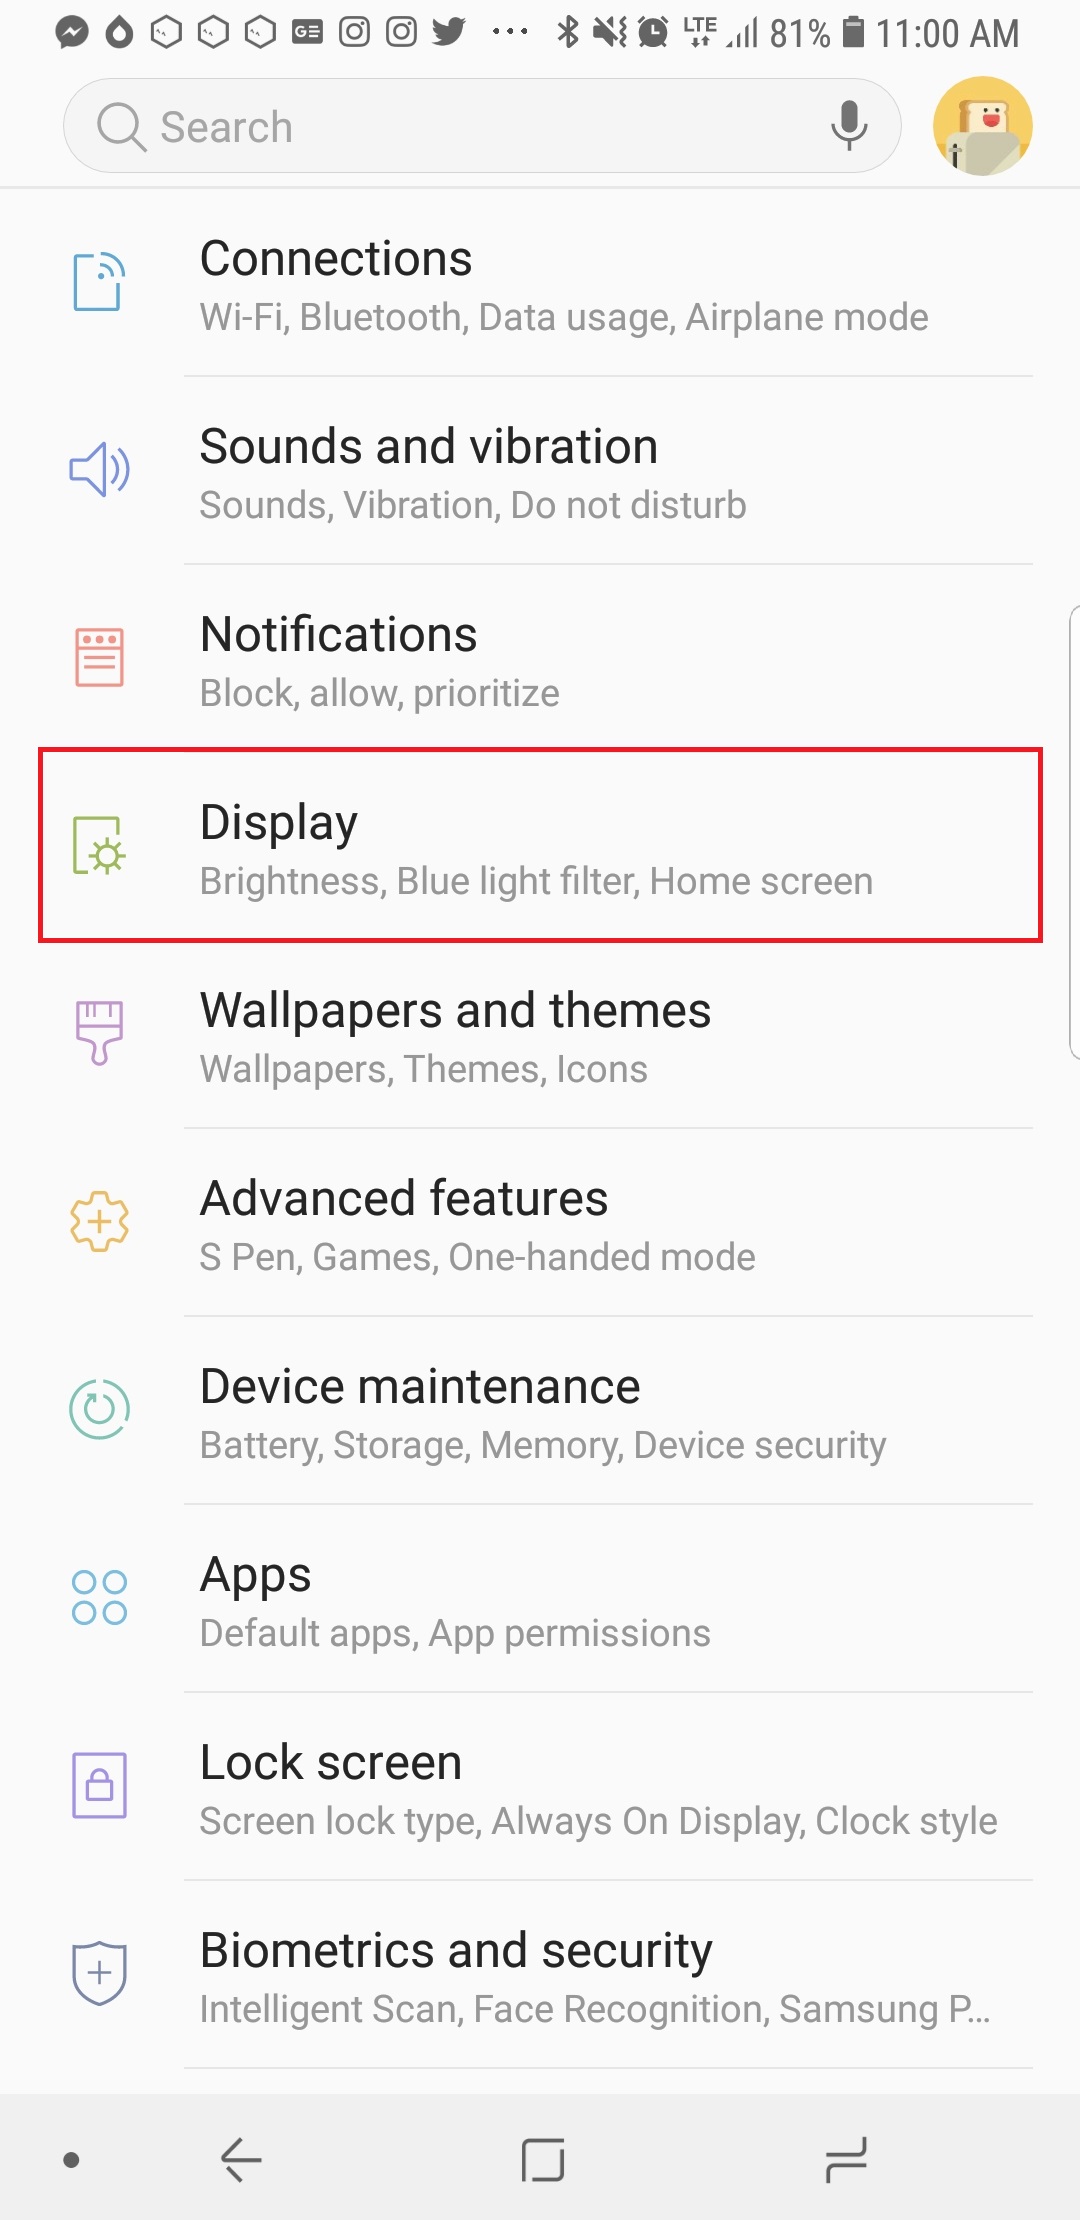
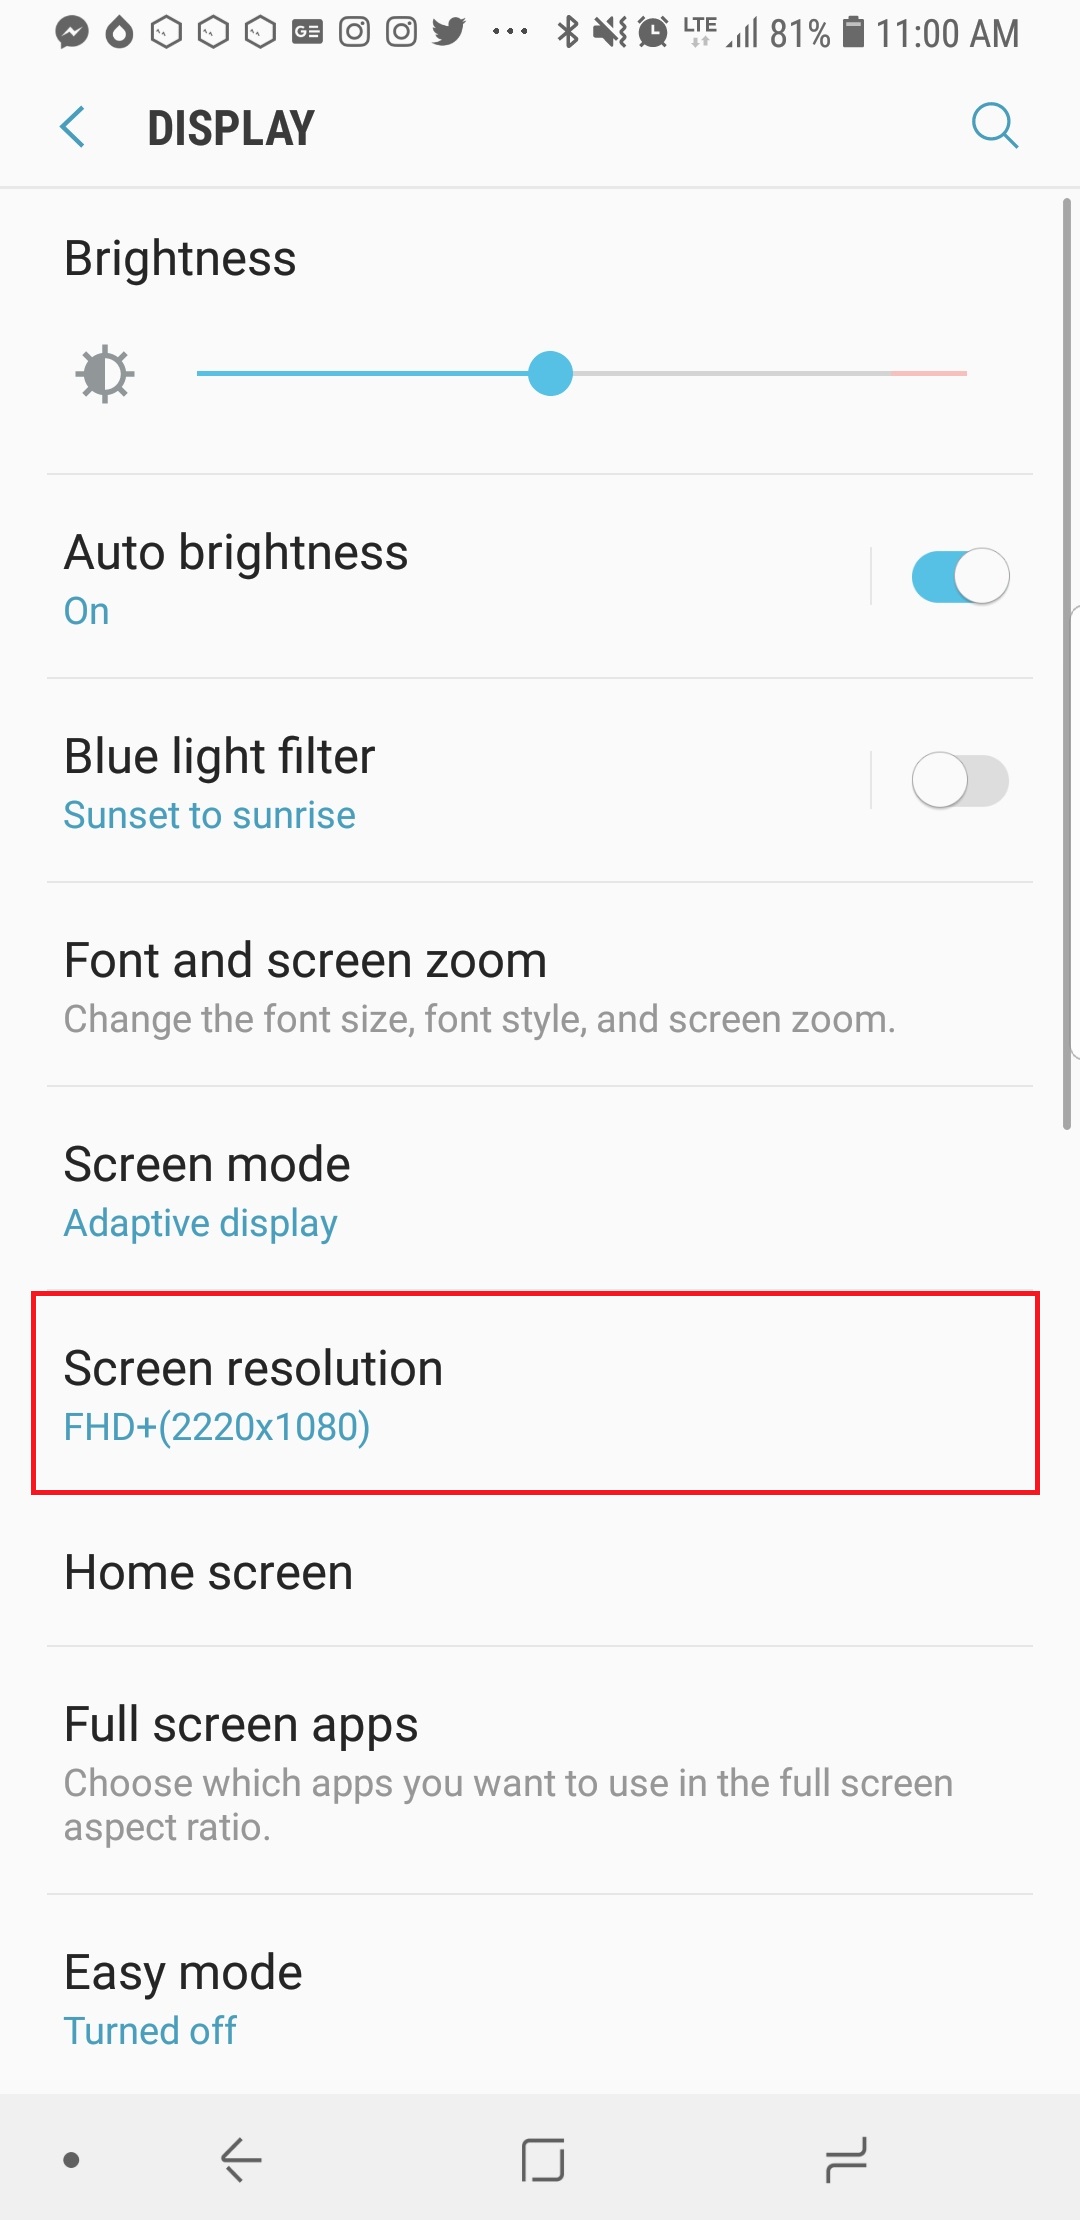

Out of the box, your Galaxy Note 9 won’t have the maximum screen resolution turned on by default. Why? Samsung said it’s to conserve battery life, and the screen still looks good at 2,220 x 1,080 resolution. But you bought the best big-screen smartphone, so, of course, you want a resolution to match the phone’s 6.4-inch screen. Head to Settings by opening your App Drawer and finding the Settings icon, or swipe down on the notification drawer and tap the gear icon at the top right. Tap Display > Screen resolution and drag the slider to the maximum 2,960 x 1,440-pixel resolution. You can even set the resolution to a paltry 1,480 x 720 pixels in case you really want to save on battery life.
Change the navigation bar


If you’re coming from another Android phone, whether it’s an LG or a Google device, you may find Samsung’s navigation button layout strange. Most Android devices use a Back/Home/Recents layout, but Samsung has long opted for the Recent/Home/Back system. Thankfully, Samsung lets you change it. Head over to Settings > Display > Navigation Bar > Button layout and tap on Back/Home/Recents to choose the traditional
Customize the S Pen


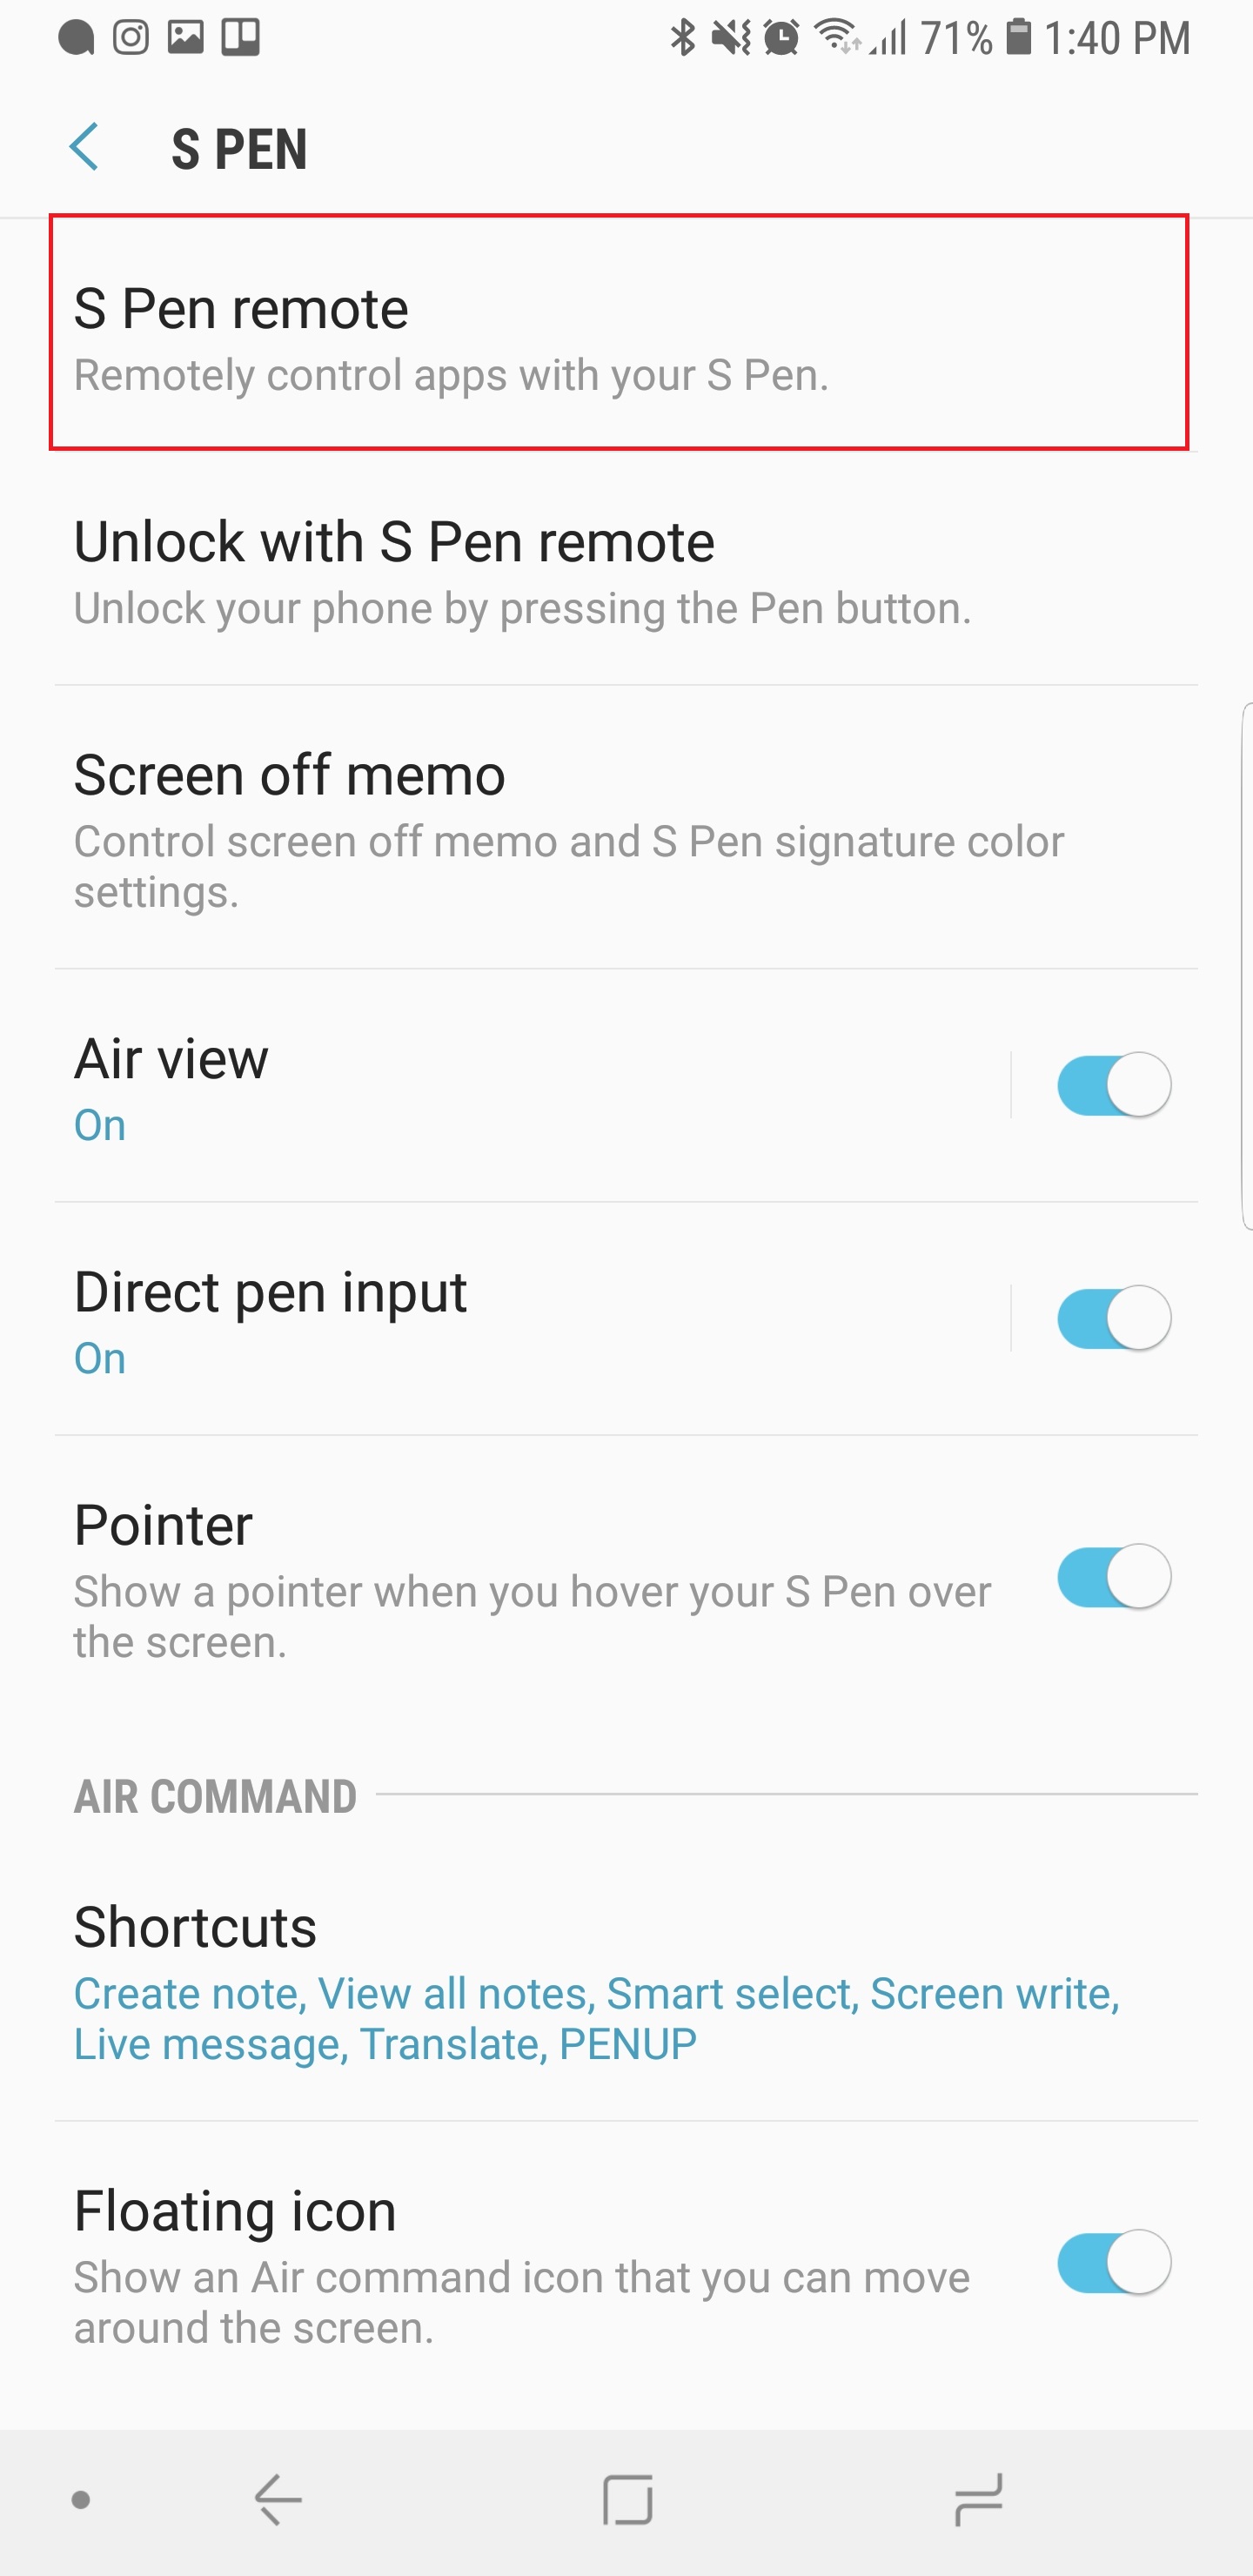

The S Pen is more useful than ever before on the Note 9, largely because it now comes Bluetooth-equipped. That means you can use it as a remote to control functions on your smartphone. By default, holding down the button on the S Pen will open the camera — press it once to snap a picture, and press it twice to swap between the rear or front camera. If you’re not much of a photographer, you can change the default app. Head over to Settings > Advanced features > S Pen > S Pen remote > and tap Hold down pen button to. You can technically choose any app, but the single and double press action buttons won’t work — only a few apps support them, such as Chrome or the Gallery app. Alternatively, you can choose to use the button to trigger S Pen functions like Create Note, Live Messages, Magnify, or Translate.
If you head back to the general S Pen settings page, there are more options to tweak so you can customize the experience a little more.
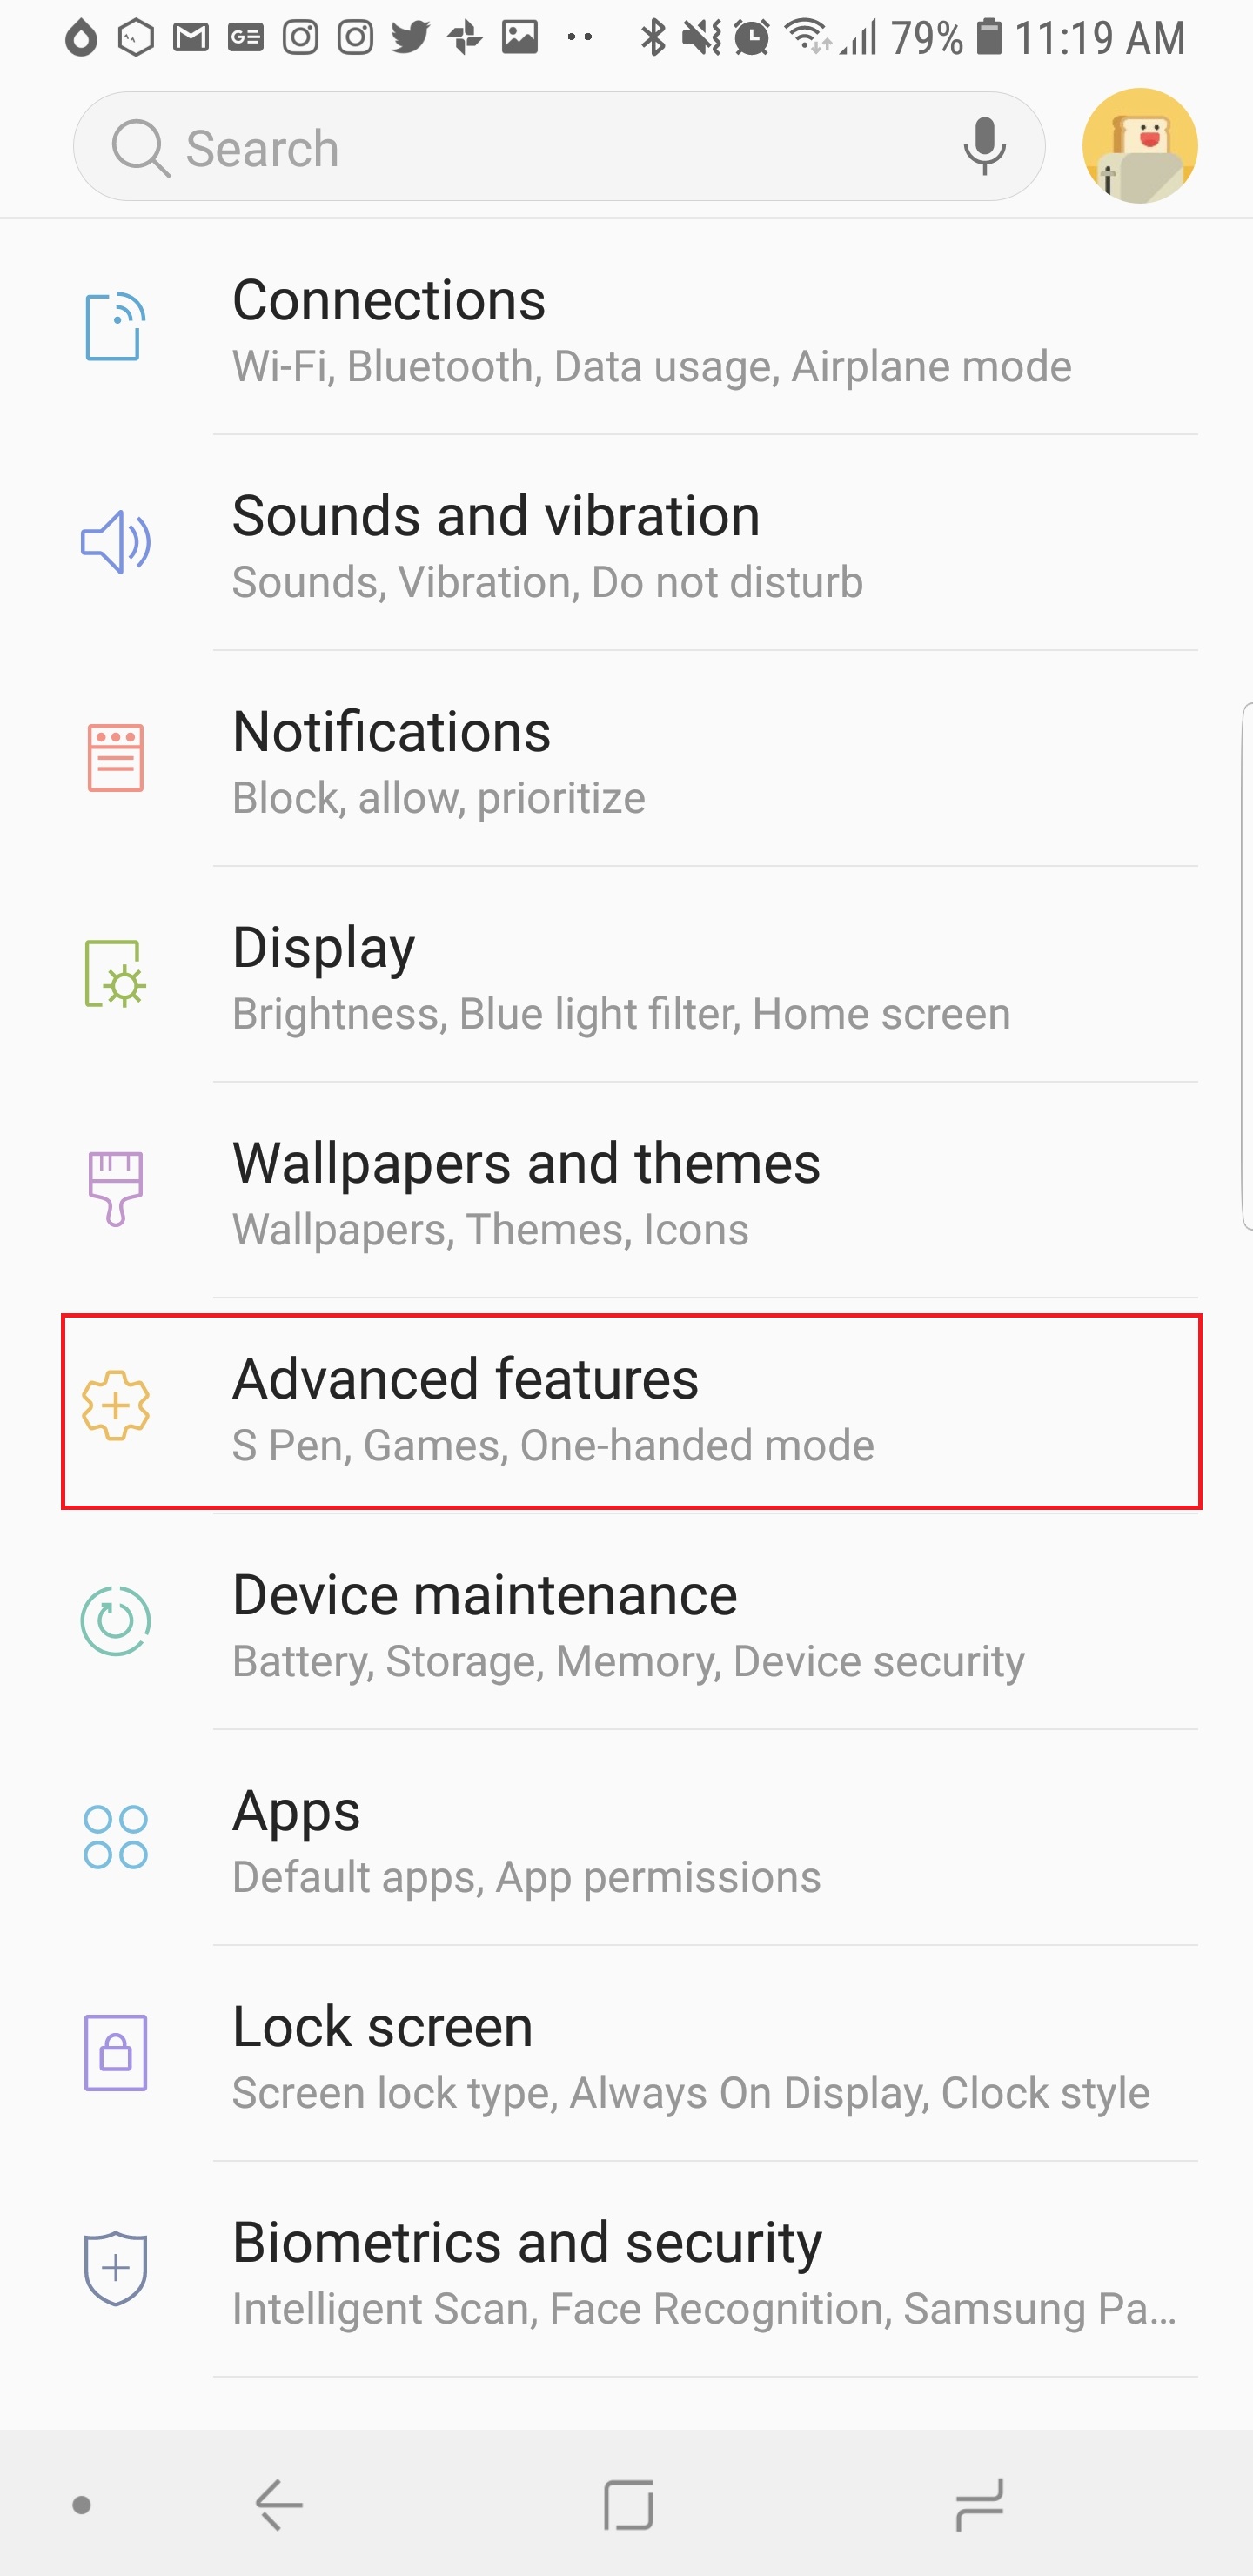
Turn on advanced features like Smart Stay, Finger Sensor Gestures, SOS messages

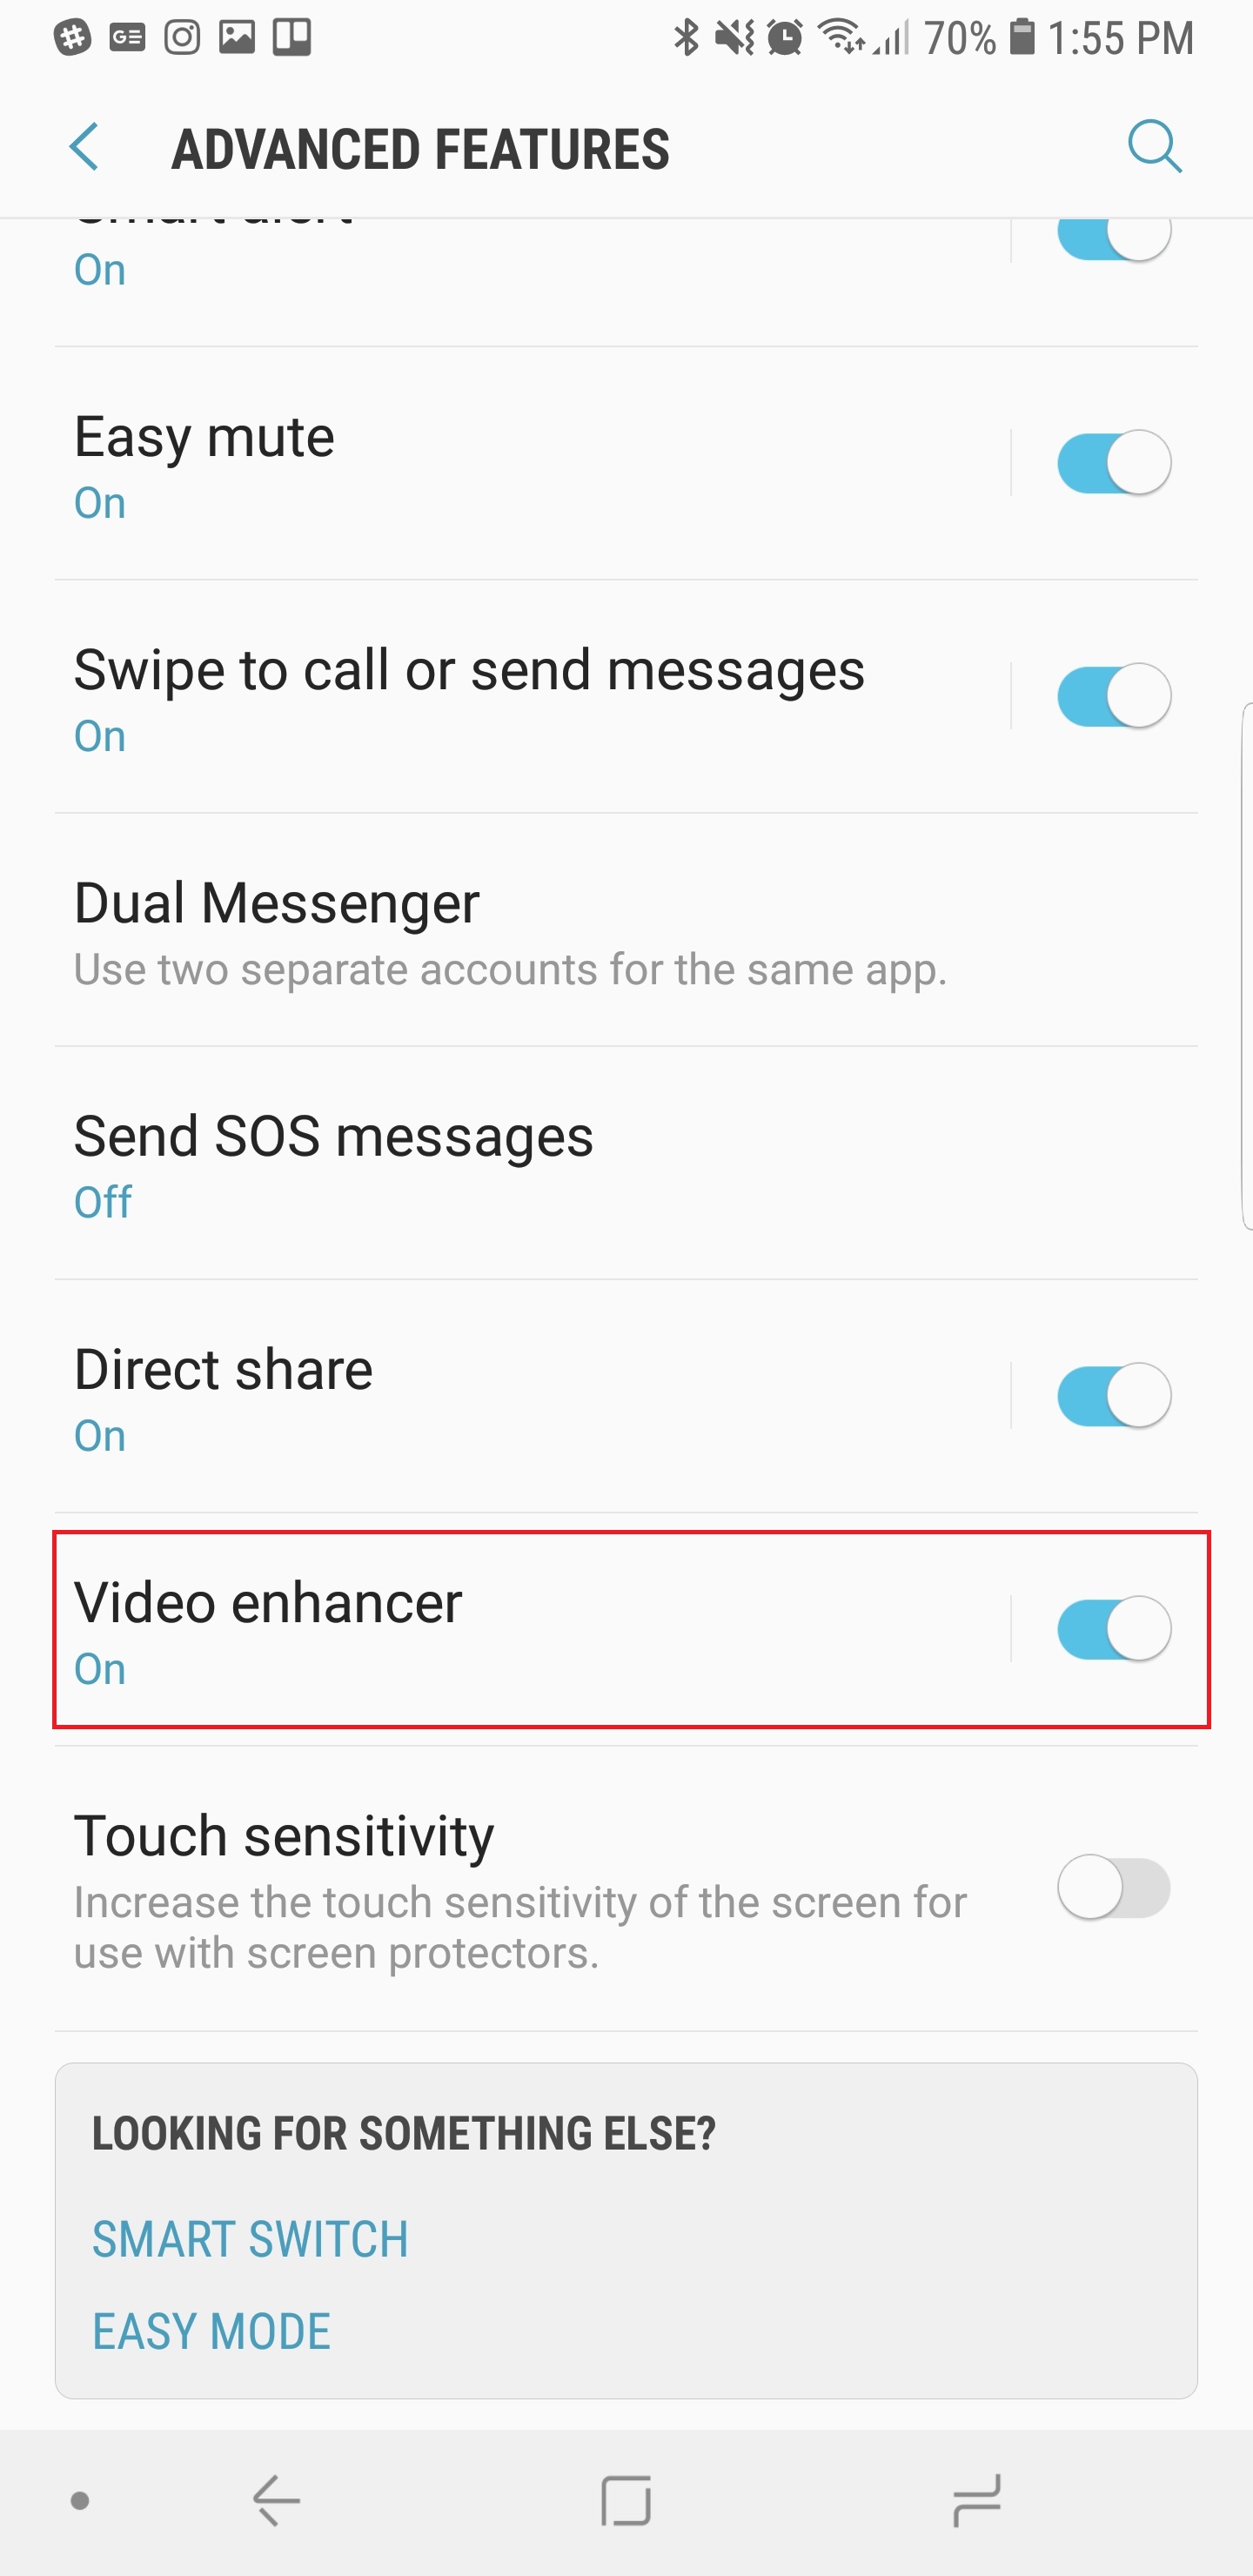

Since you’re in the Advanced features section already, we recommend taking a look at a few other options you can toggle on that add some convenience. Smart Stay, for example, is a feature that has been around in Samsung phones for quite some time, and it will keep the screen on as long as it recognizes you are still staring at it. Tap the toggle icon for it in Settings > Advanced features > Smart stay. You should also toggle on Finger Sensor Gestures, which will allow you to swipe your finger down on the rear fingerprint sensor to pull down the notification drawer (or open Samsung Pay). This setting is a few options below Smart Stay. There’s also Video enhancer to toggle on further below, which will make videos look better, and Send SOS messages will let you tap the power key three times to send out an SOS alert to family or friends.
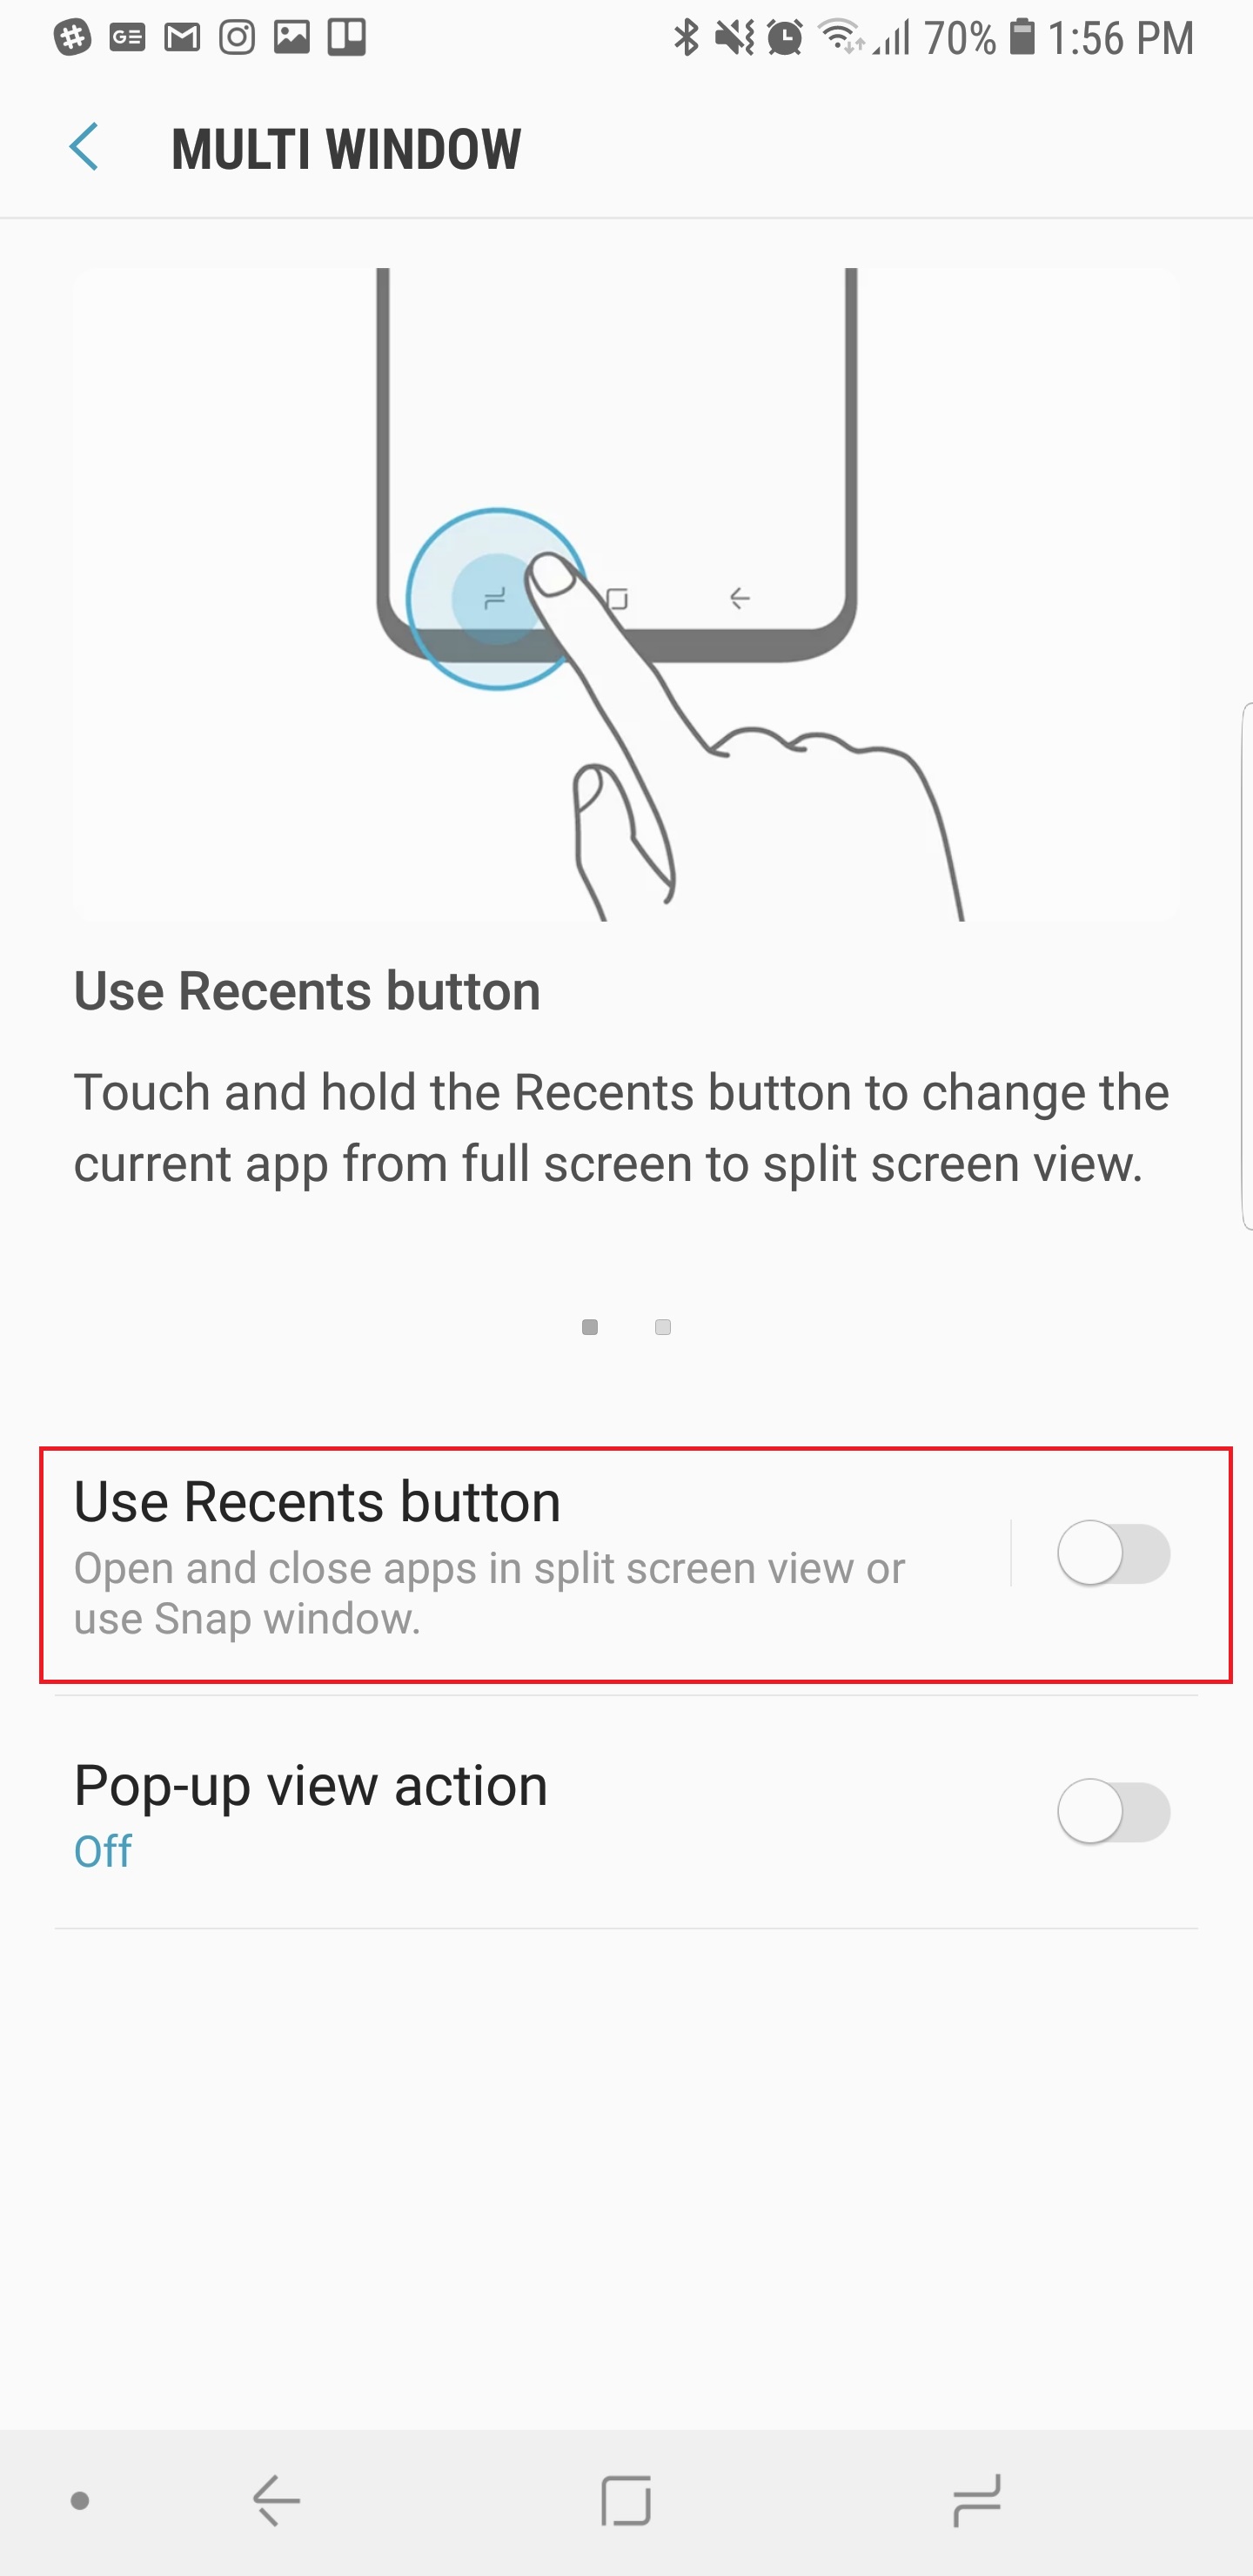
If you love using split-screen mode, you can customize this further by tapping on Multi window > Use Recents button. This will now turn on split-screen mode when you press and hold the Recents button.
Hide apps in the App Drawer
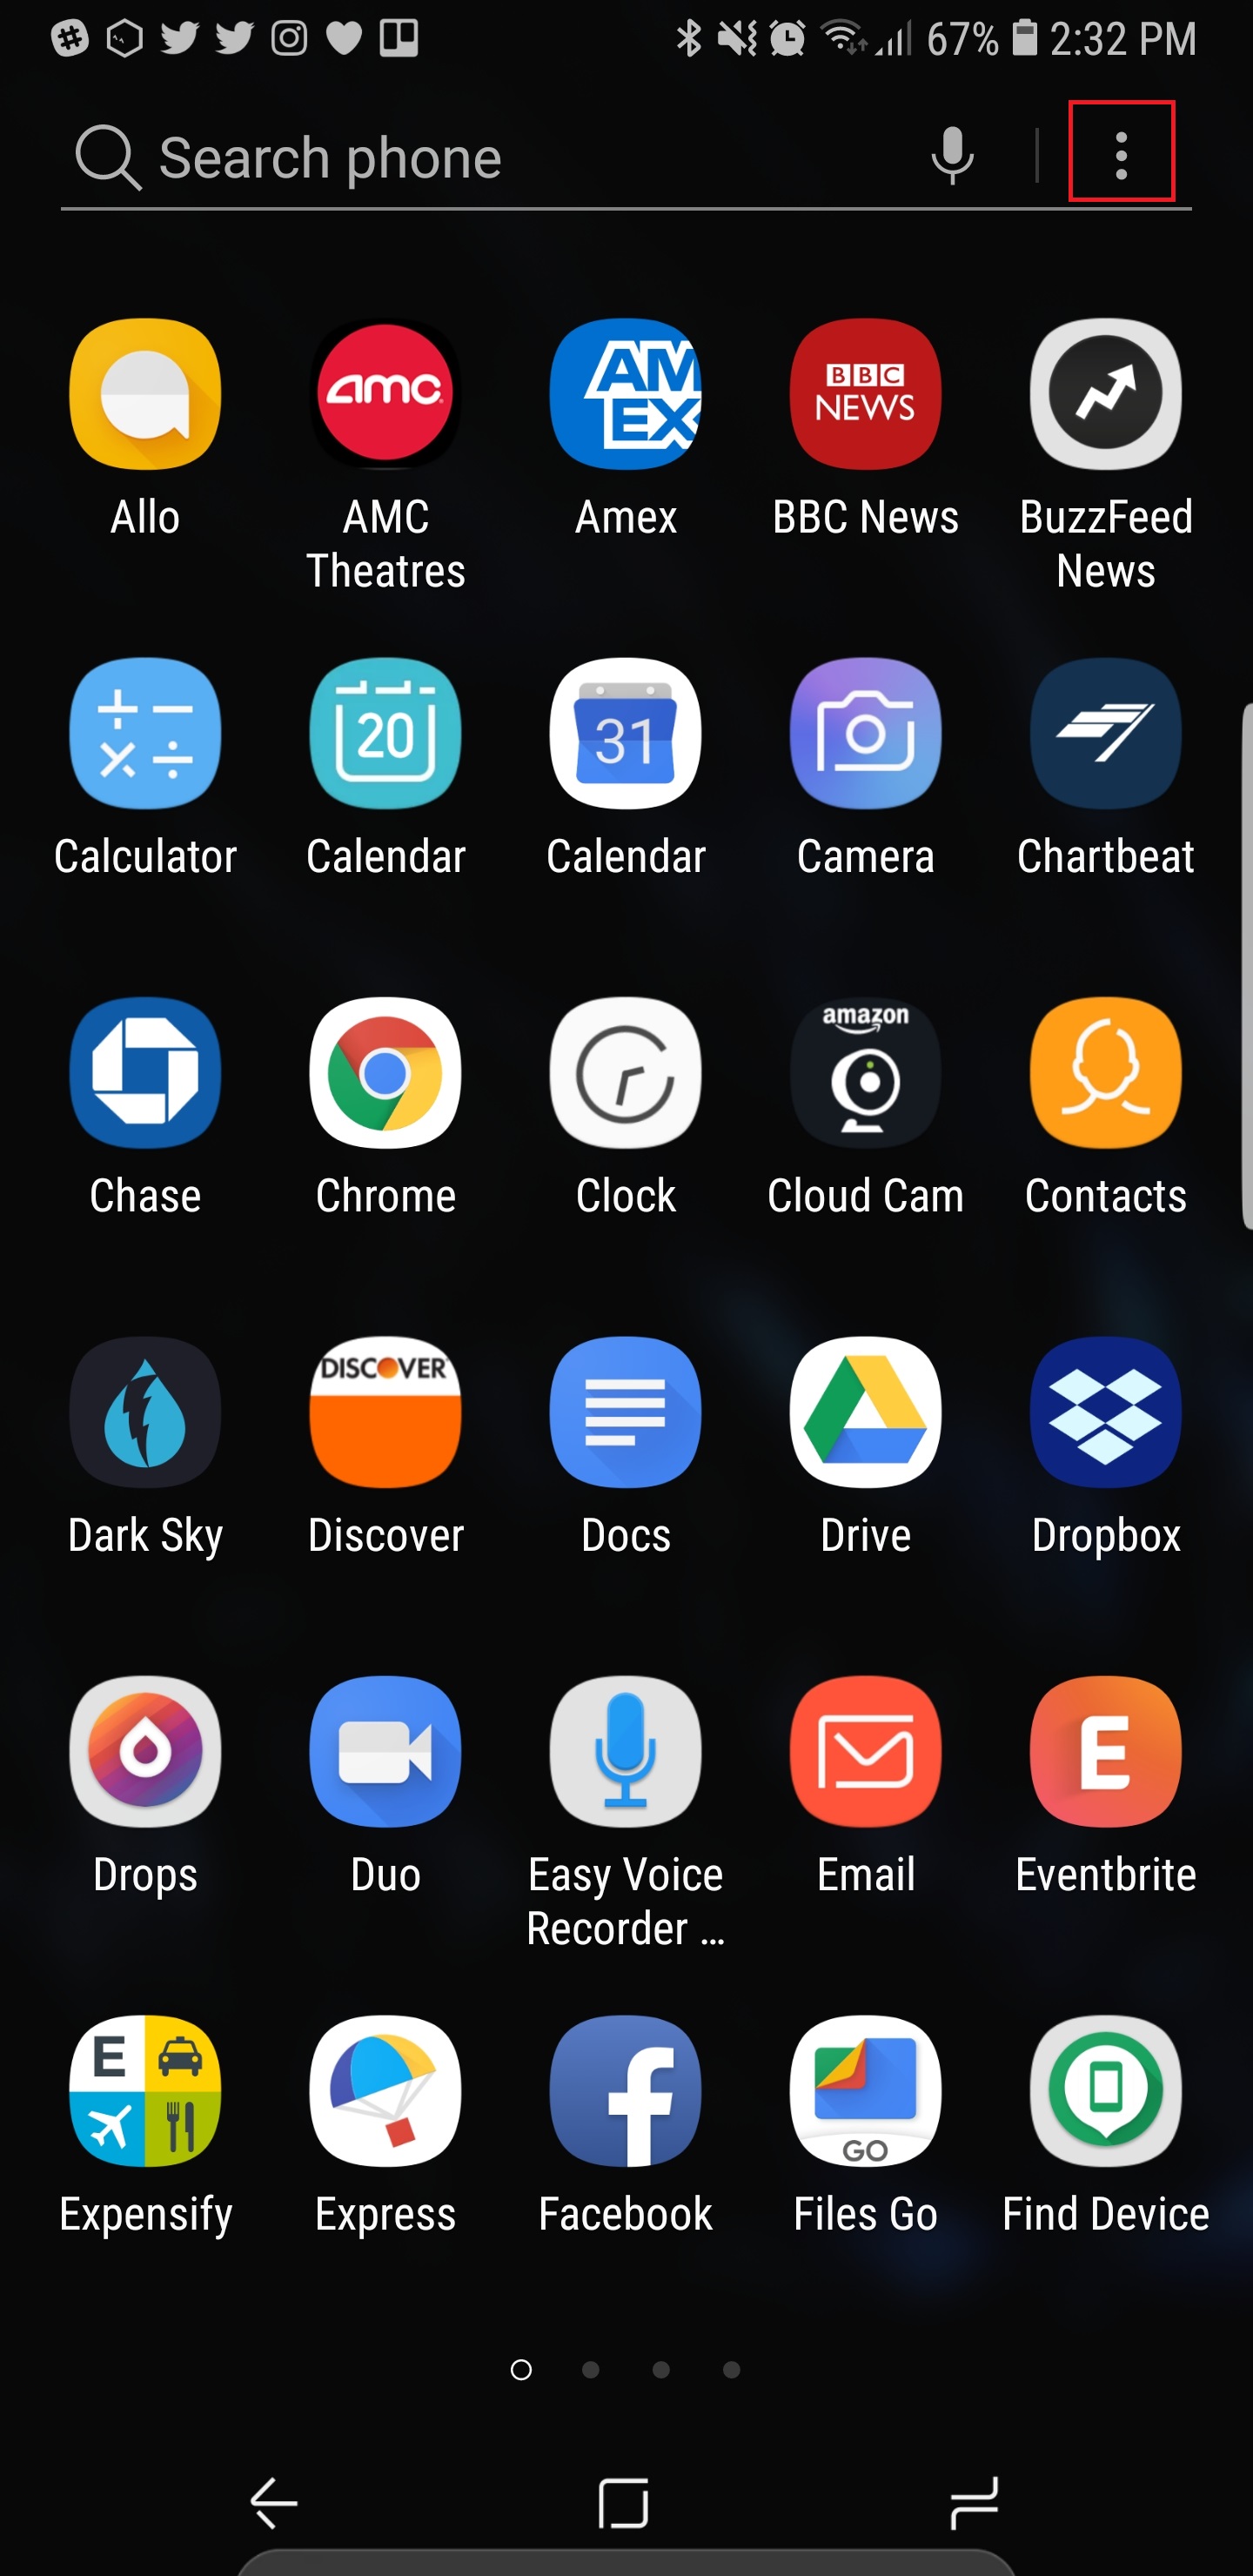


Is the App Drawer a little too cluttered for you? If there are apps you don’t use and can’t uninstall, you can hide them from showing up here by opening the App Drawer, tapping on the three vertical dots on the top right, and tapping Home screen settings > Hide apps. Now just select the apps you want to hide and tap Apply.
Back in the Home screen settings, you can hide the App Drawer completely and just put all your apps on the home screen by changing the Home screen layout; or you can add an Apps button to the dock if you don’t want to swipe up for the App Drawer.
Turn off Bixby Home


At the moment, there’s no way to easily remap or turn off the Bixby button on the Galaxy Note 9. You can turn off Bixby Home, however, which is the screen to the left of the home screen.
Use Volume Keys for media, toggle system sounds

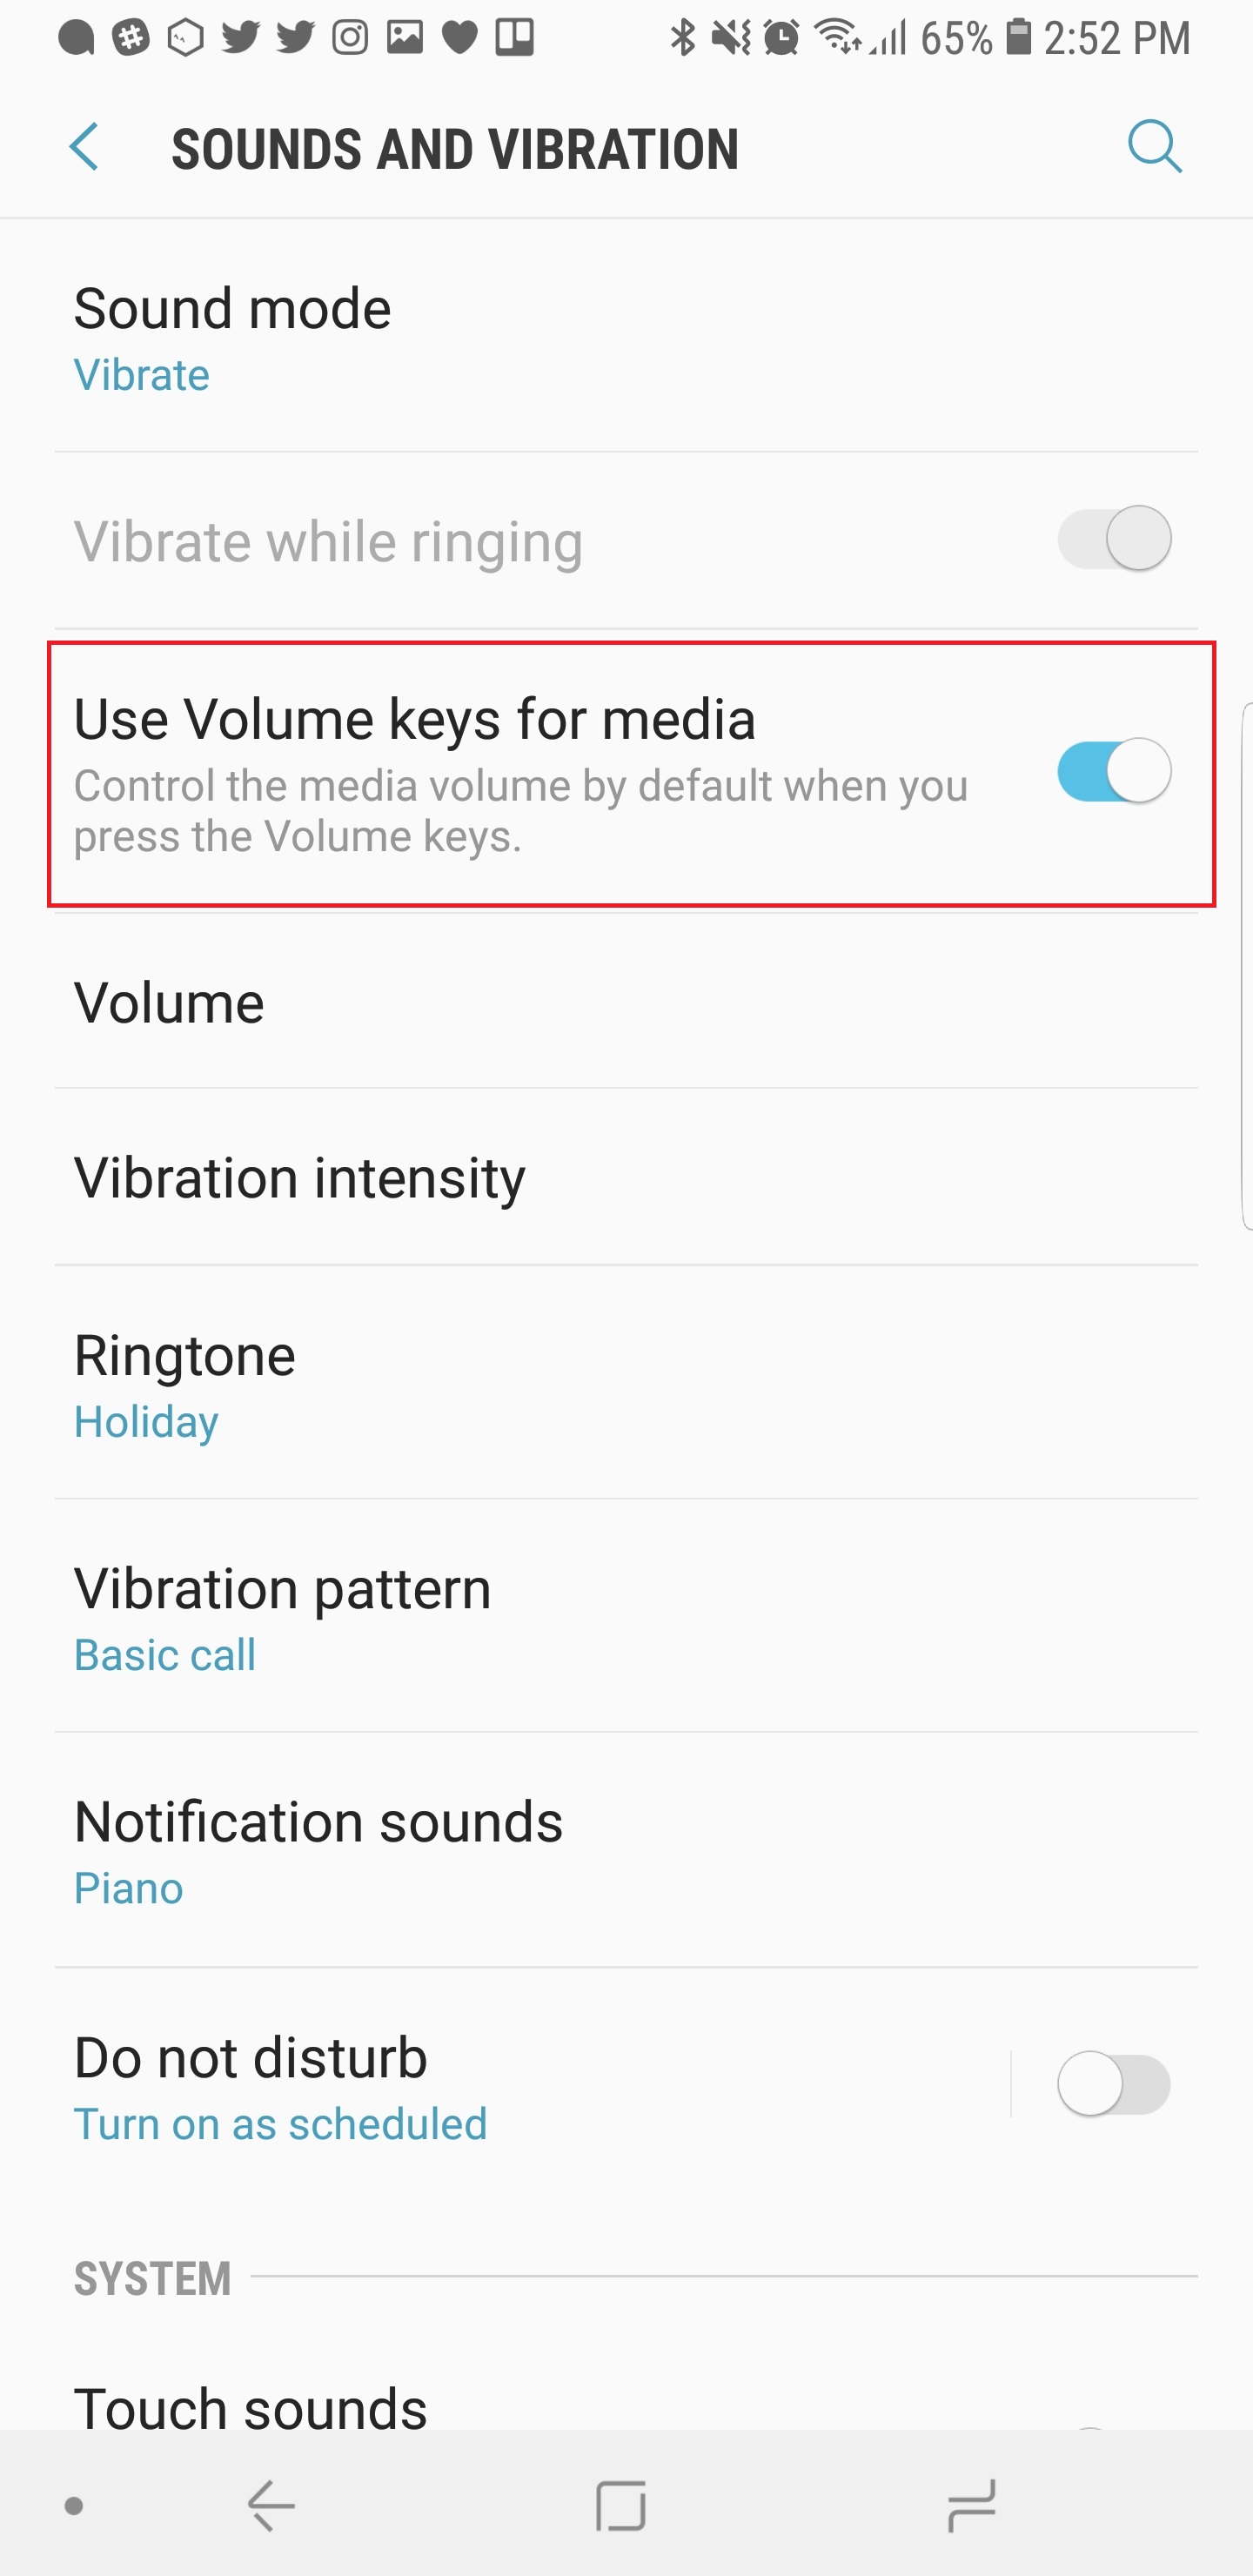


If you often leave your smartphone on silent or vibrate, then you may want to make sure the volume buttons focus on controlling sound from media. You can change this by heading to Settings > Sounds and vibration and togglling on Use Volume keys for media. Now, no matter when you press the volume buttons, it will default to increasing or decreasing the media volume.
Samsung also leaves a lot of system sounds on by default, such as when you tap items on the screen, when you dial on the keypad, or type on the keyboard. You can customize exactly what you want sound turned on for, and what you want to turn off. It’s in the same Settings > Sounds and vibration section, just look below System and Key-tap feedback. One more thing — if you have headphones that support Dolby Atmos, you can turn it on here as well; just scroll all the way to the bottom, tap Sound quality and effects, and toggle on Dolby Atmos.
Make the Edge Panel transparent


As useful as Edge Panel is, the handle on the edge of your home screen can look a little ugly. Thankfully, there’s a way to hide it without compromising all the features Edge Panel provides. Slide out the panel from the edge of the screen and tap the gear icon on the bottom left. Next. tap the three vertical dots on the top right, and go to Edge panel handle. Here. you can choose to put the Edge Panel on the left or right edges of the screen, and you can increase its size and transparency to your liking. We’ve set our transparency to the highest and maximized the size, so swiping from the edge will still bring out the panel, which will now look hidden.
See all your notifications, schedule the blue-light filter

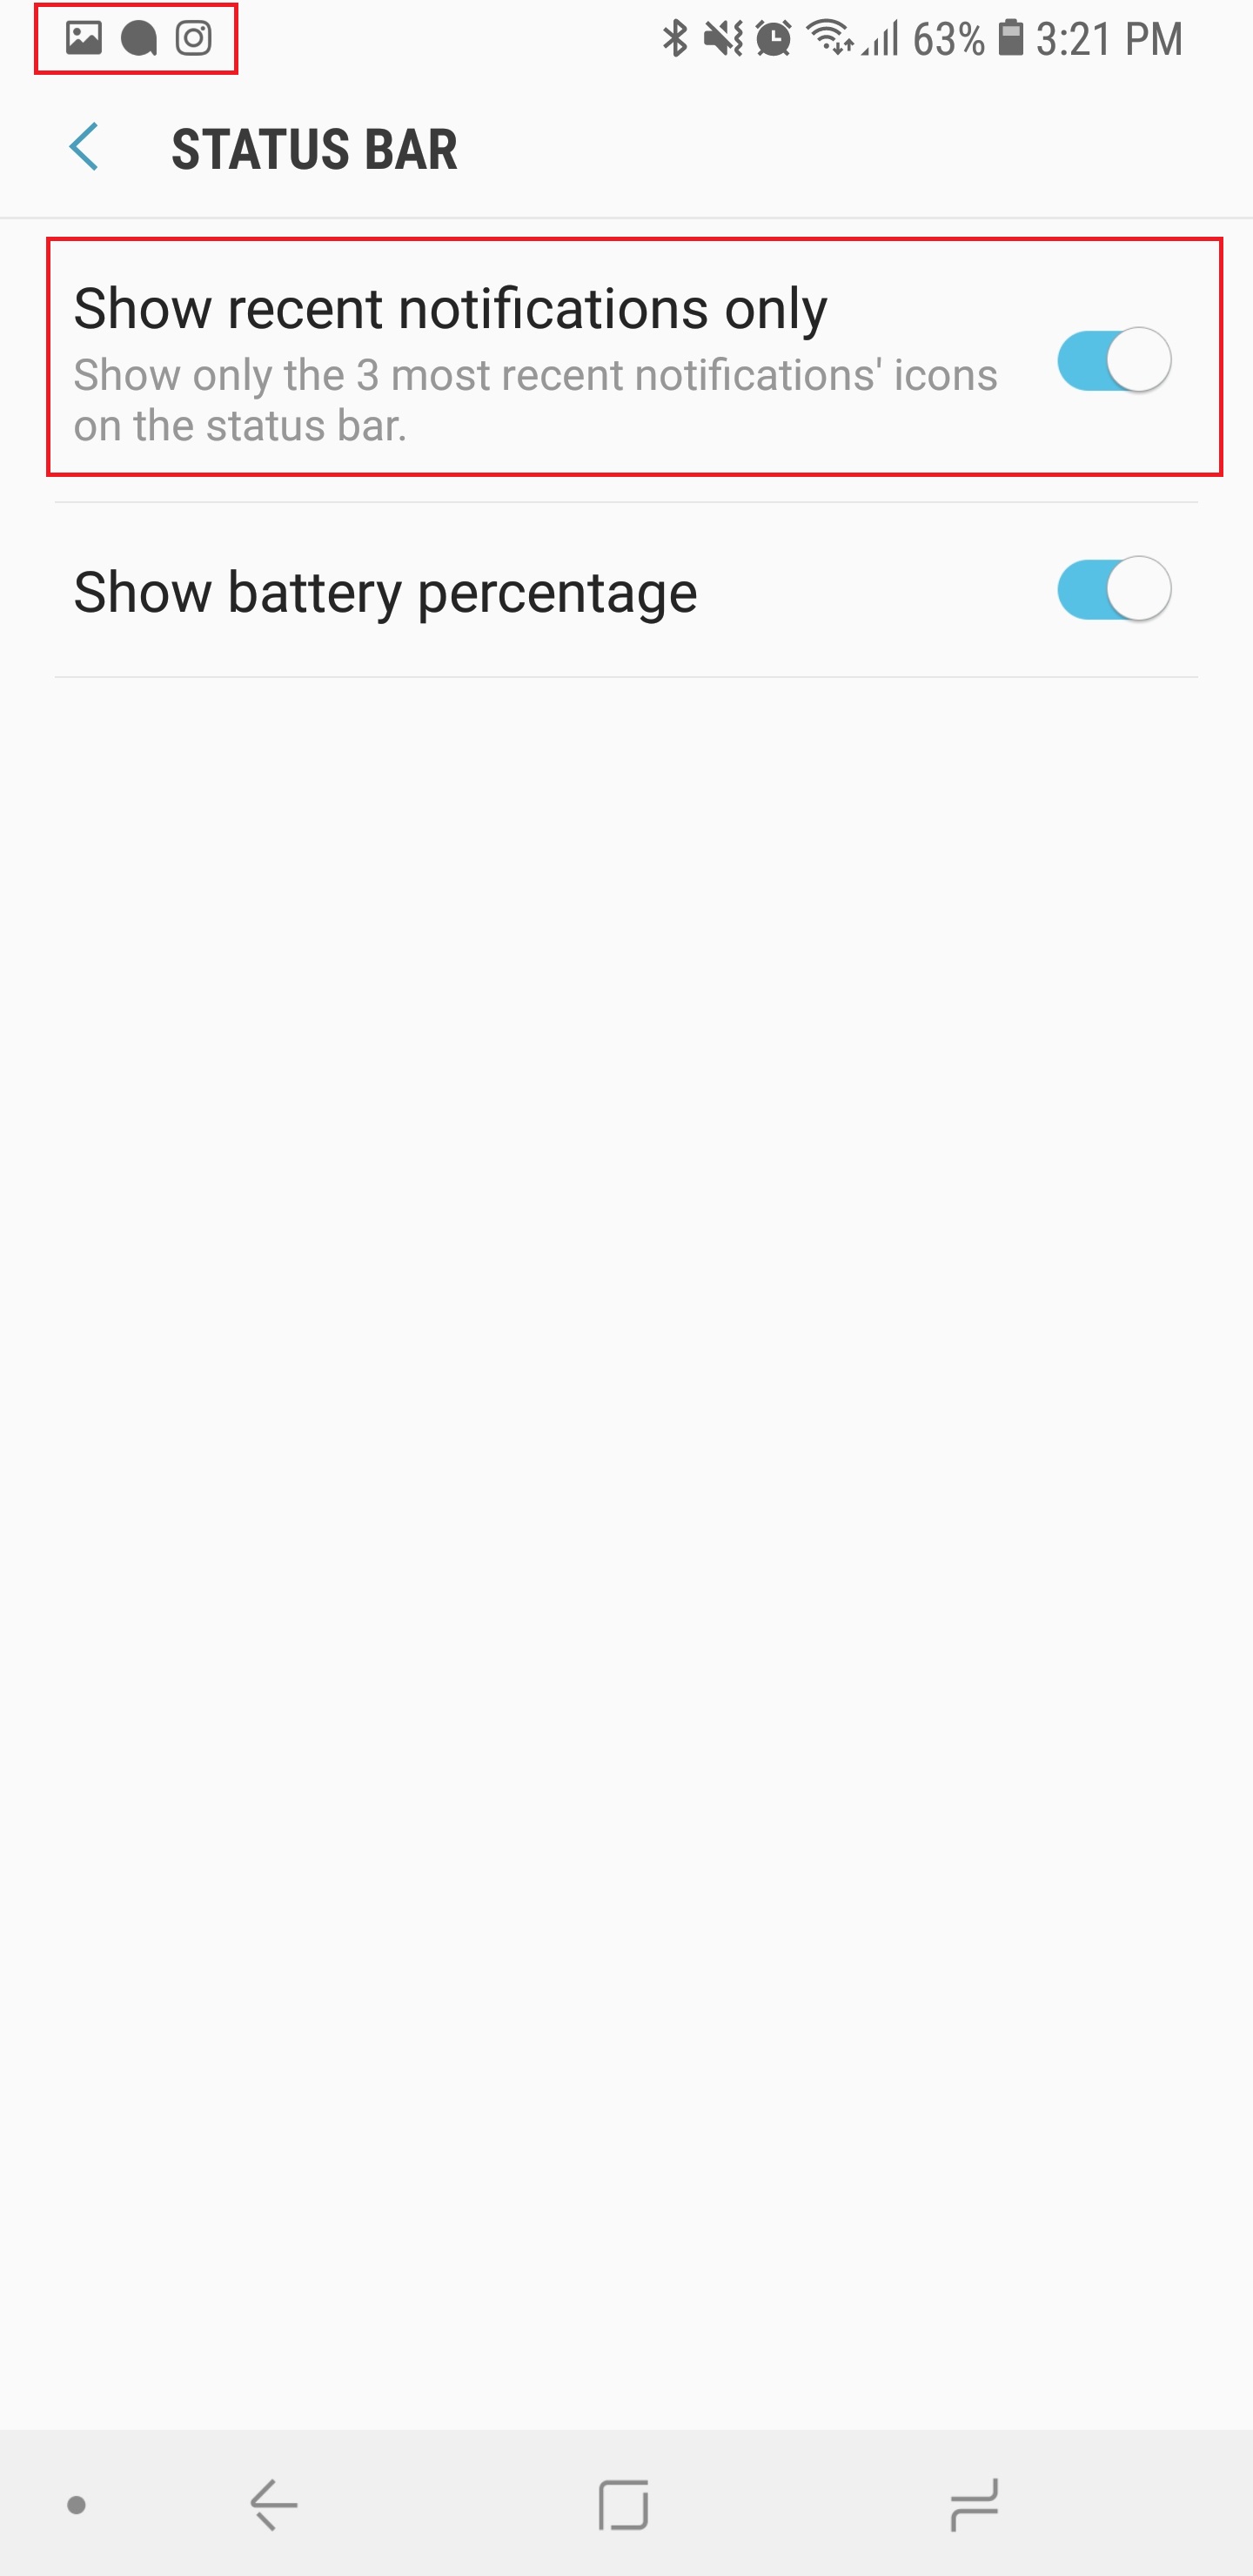

By default, you will only see three of the most recent notification icons in the Status Bar at the top of your phone’s screen. If you want to see all the notification icons from all your alerts, head over to Settings > Display > Status Bar > and toggle off Show recent notifications only. Now your Status Bar will be populated with more than three notification icons when you have a lot of alerts.
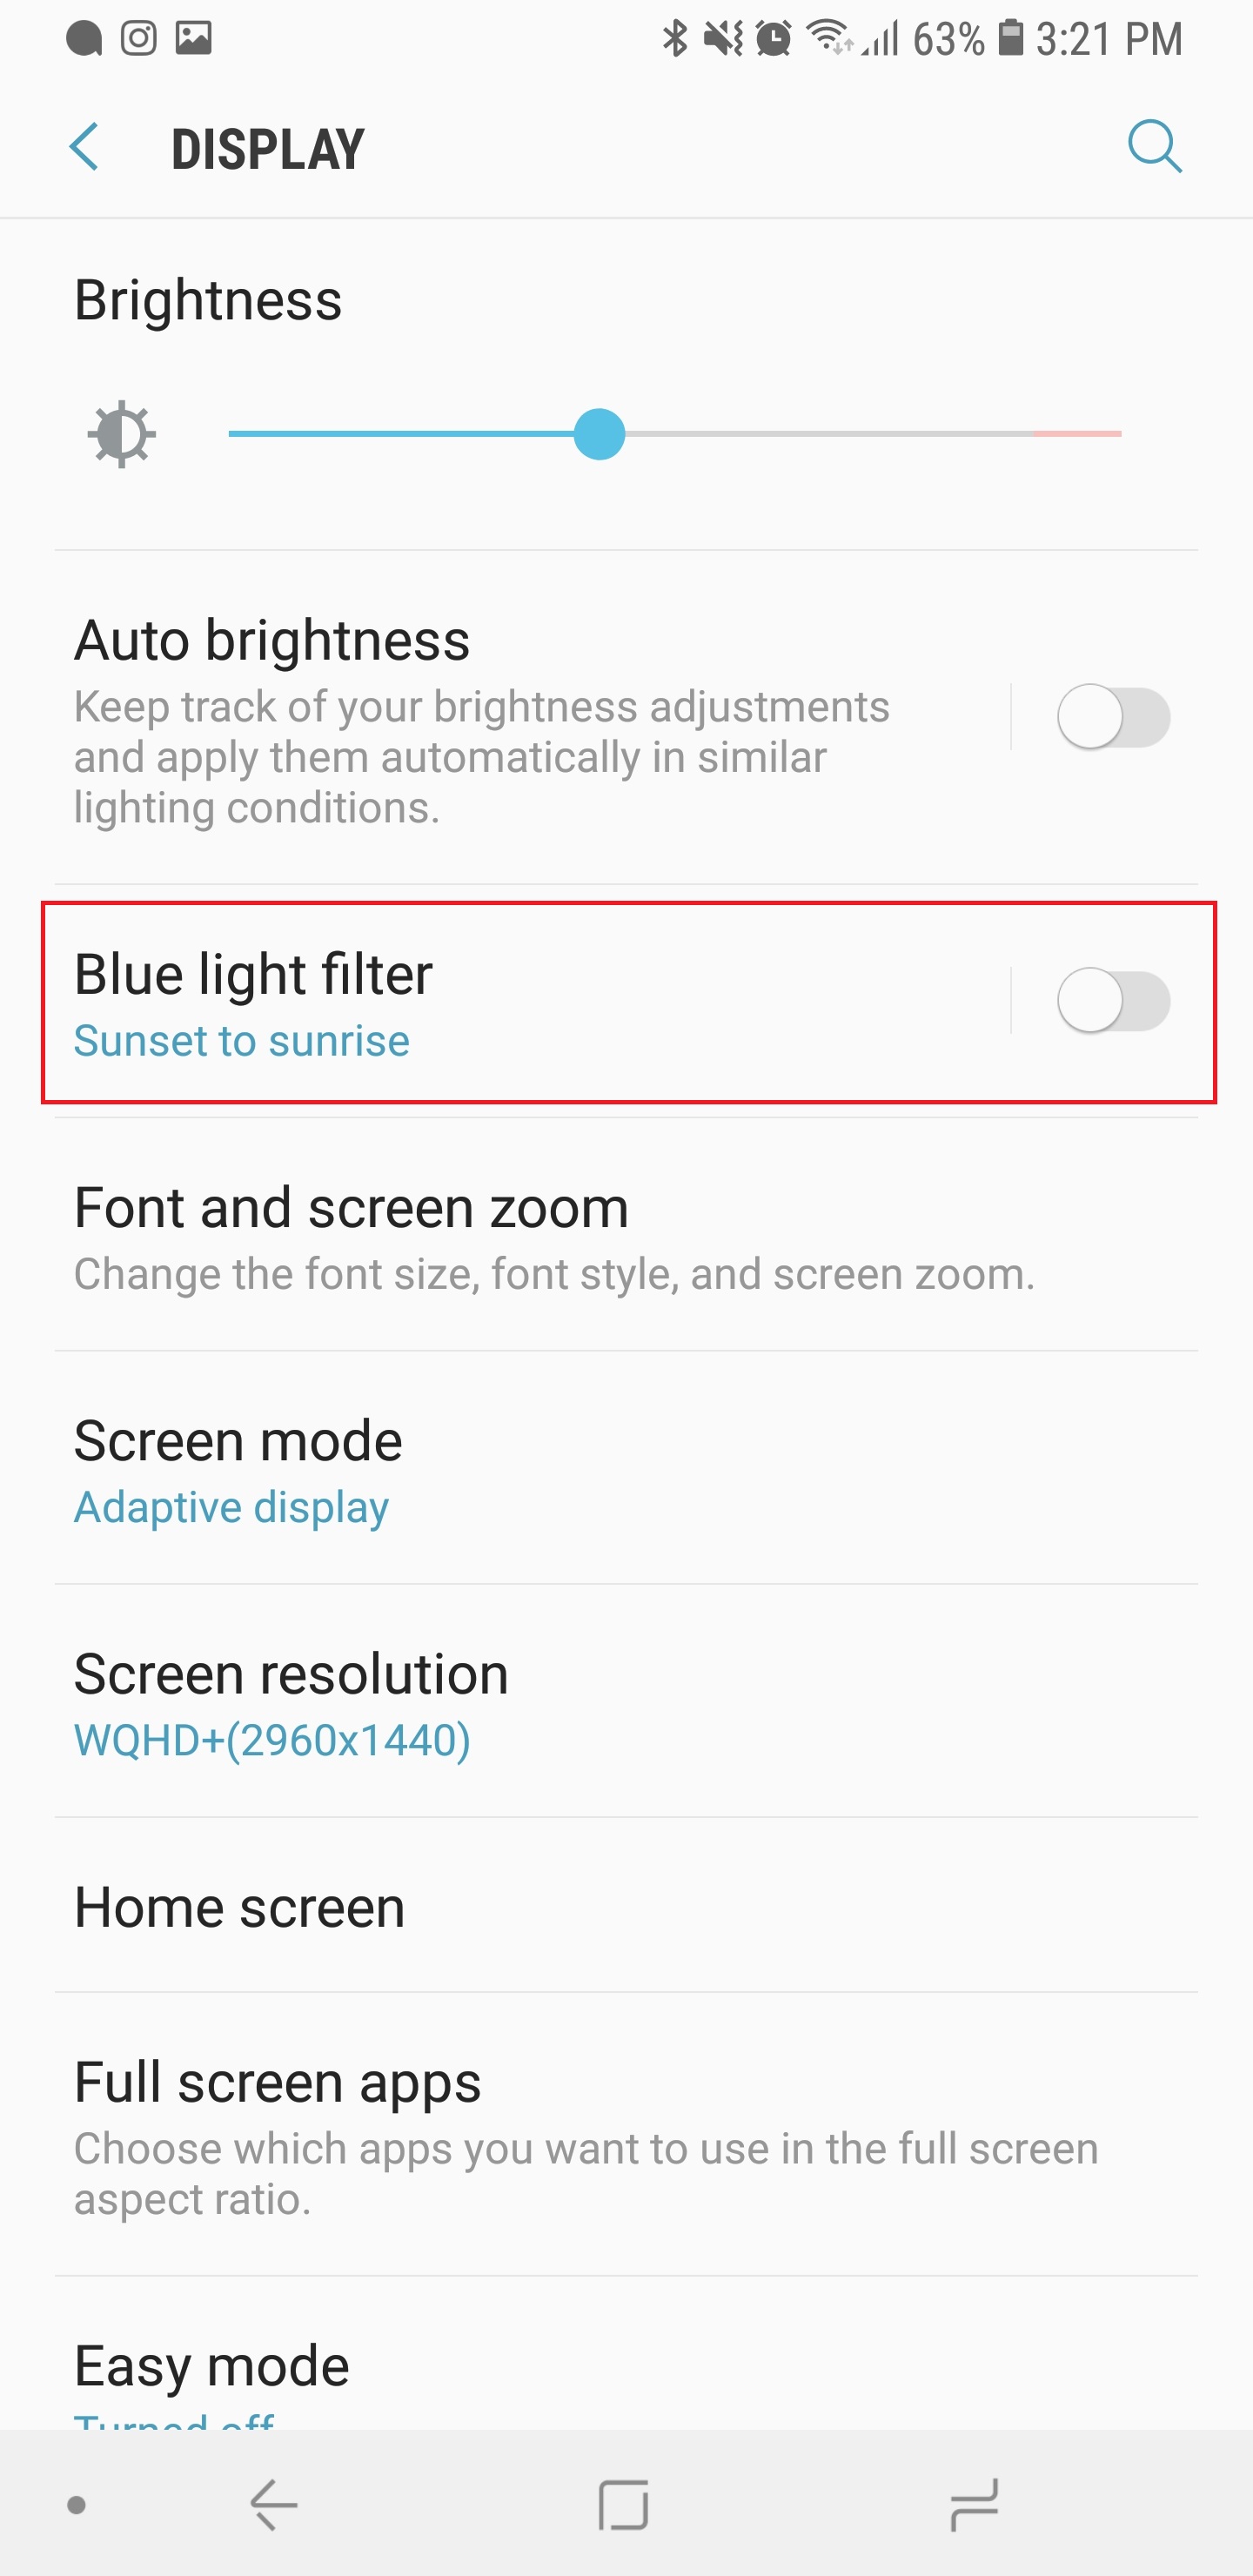
In the same Display section, you should also consider scheduling the blue-light filter to protect your eyes. Studies have shown that blue light from screens at night can be harmful to our sleep and health, and blue-light filters try to mitigate this by decreasing the amount of blue light in screens. Head over to Display > Blue light filter to turn it on. You can schedule it to turn on at sunset and off by sunrise, or you can create a custom schedule. You can quickly toggle the filter on or off by using the quick settings tile in the notification drawer.
Personalize the lock screen clock
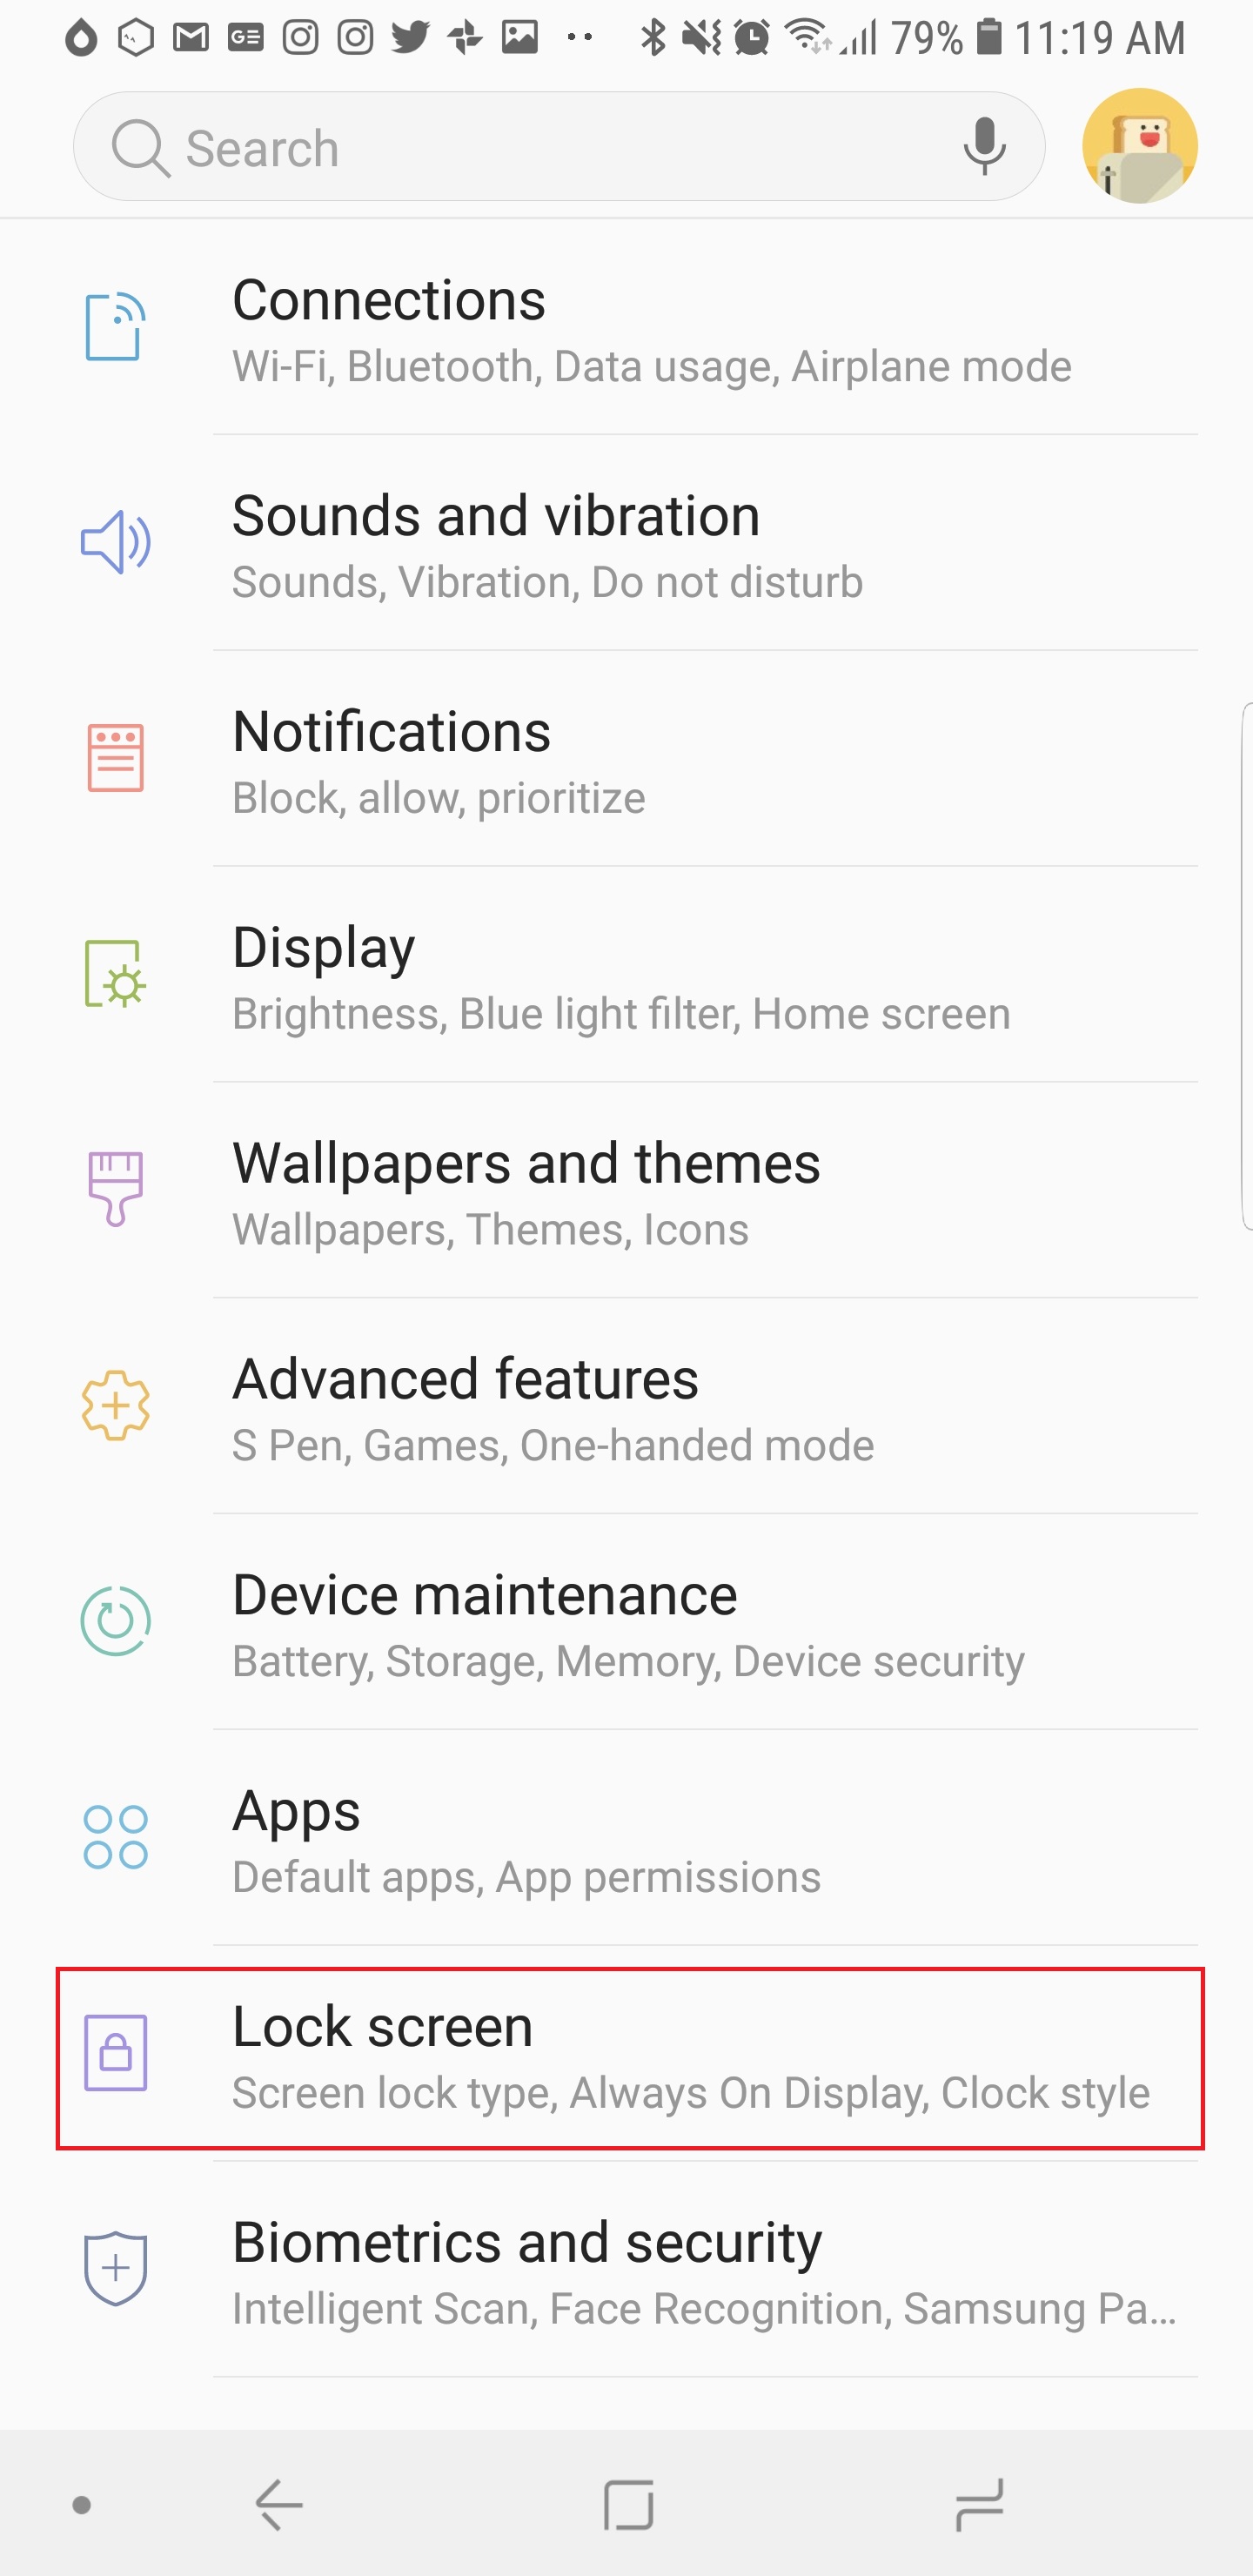
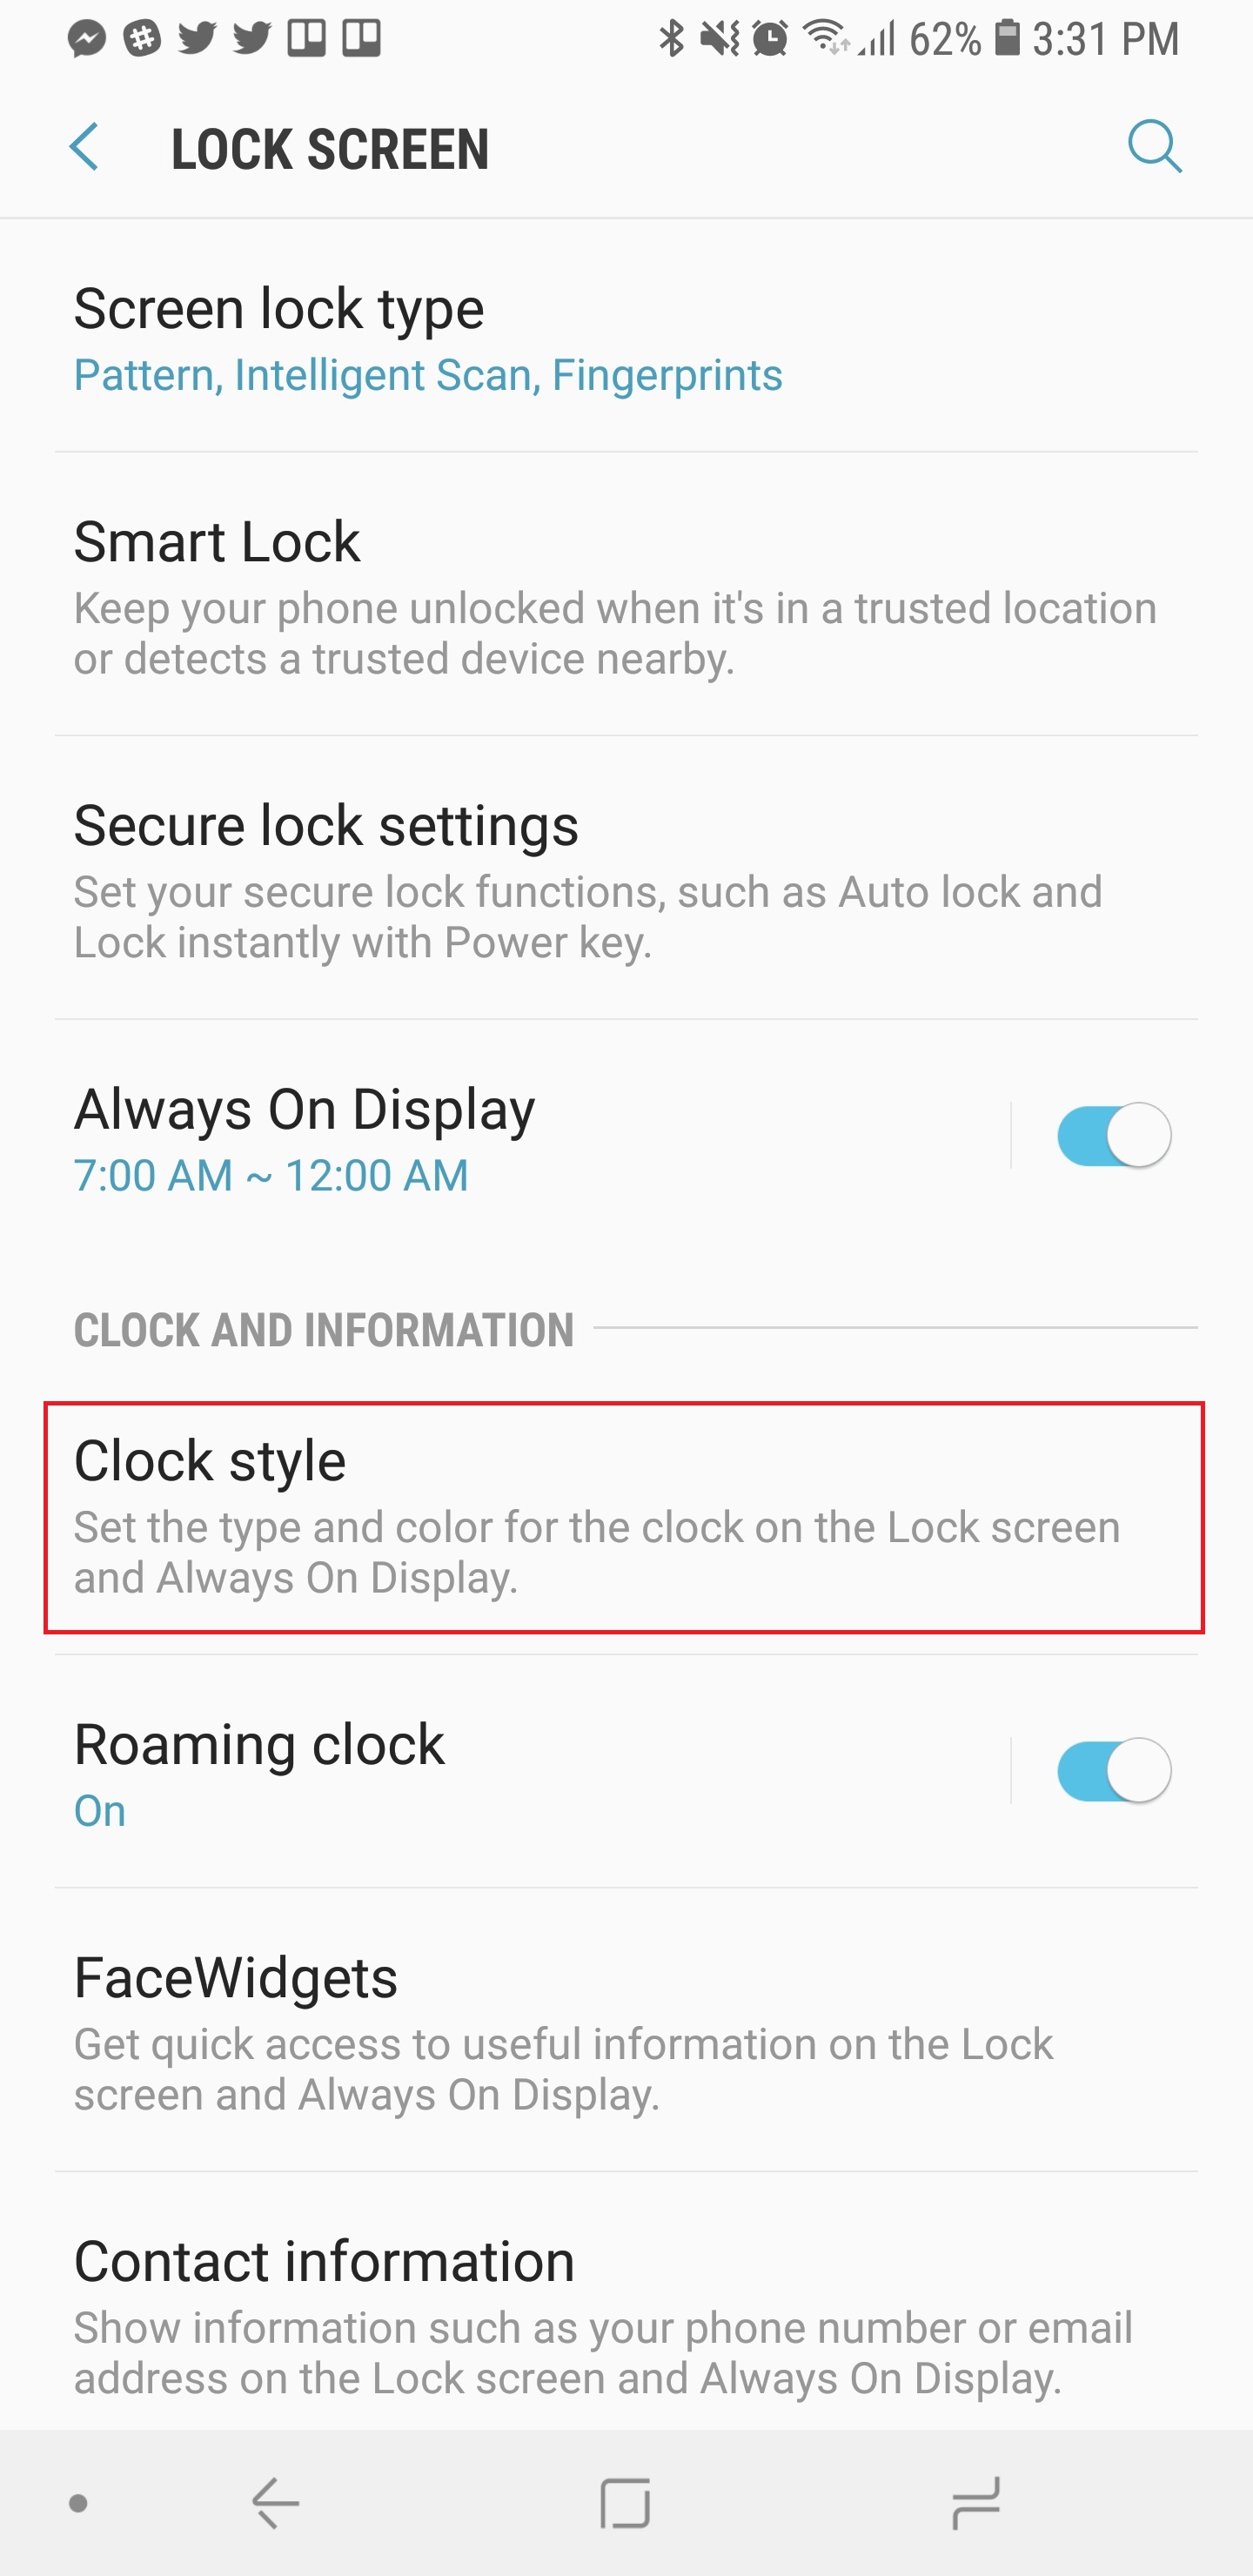

Did you know you can change the look of the clock on the lock screen and always-on display? Head over to Settings > Lock screen and first make sure the Always On Display is toggled on. Then tap Clock style and you will see two tabs at the top — one for the Always On Display and the other for the Lock Screen. At the bottom are several options to choose from, and when you pick one, you can then tap the Color tab at the bottom right to tweak the color of the clock. When you’re finished, tap Done at the top right.
We hope you’re enjoying your new Note 9. Check out our guide on everything you can do with the new S Pen to get the most out of the stylus.
Editors' Recommendations
- Check your Samsung Galaxy S22 for a big update right now
- The 10 accessories you need for your Samsung Galaxy S24
- New Galaxy Z Fold 5 and Flip 5 features are heading to older devices
- Want to turn your iPhone into a Galaxy S23? This app is for you
- Samsung brings the Galaxy S23’s new software to older phones