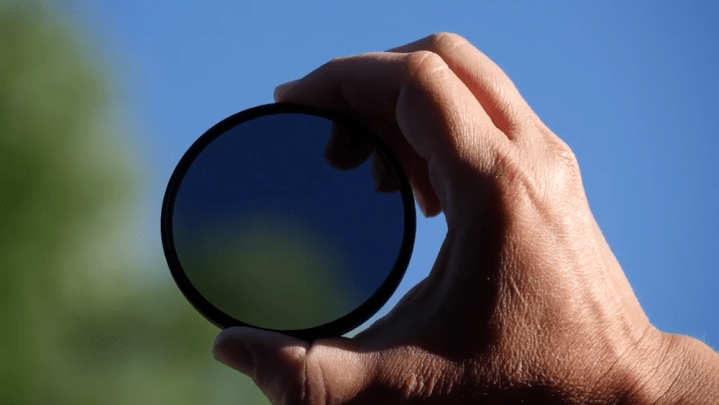
Learn why polarizer filters are useful, and how to use them

learn use polarizer filter educational video steve perry
A polarizer filter not only makes blue skies bluer, it can also make other colors more saturated. (Credit: Steve Perry). Image used with permission by copyright holder
Back in the days of analog photography, filters were a photographer’s best friend. Today, with digital photography, many of the effects filters had on film can be replicated during post-processing, especially those that concern color reproduction such as the color filters used in black-and-white photography, or graduated filters that would darken the sky while keeping the foreground nice and bright.

But there’s one filter with an effect that cannot be emulated by software, and that’s the polarizer filter. While most of us have probably heard about polarizers before, and many of us may actually own one, we’re sure that some of the tips photographer Steve Perry gives in his latest educational video will open your eyes, just as they opened this writer’s.

Recommended Videos

One of the most popular uses of a polarizer filter, according to Perry, is to darken blue skies. And while this effect could be achieved during post-processing. Perry explains that actual polarizers help eliminate reflections from all kinds of objects, which in turn will make colors appear much more saturated.

When photographing landscapes, a polarizer not only makes colors “pop” by filtering out reflections from objects such as foliage and stones, it also helps remove some of the haze that can make pictures like that of mountain ranges appear dull. Another great use for a polarizer filter is to look beneath the surface of water, for example when photographing a pond with fish in it.

Finally, a polarizer filter can be used to make a nature scene more colorful even on overcast days, when most of us would probably keep their cameras at home. But here’s another thing you may not have known: when using a polarizer on a wide-angle lens, you may end up with darker and brighter patches in the sky. So if you’re using a wide-angle lens for landscape photography and have a lot of sky in your image, better take the filter off.

These and more clever tips can be found in Steve’s video below. For more, take a look at his YouTube channel where he regularly posts educational videos like this one.

(Via DIY Photography via Picture Correct)

Felix Esser
Former Digital Trends Contributor
Felix is a freelance tech journalist with a strong focus on photography. Based out of central Germany, he contributes to…
Photography 101: What is a histogram, and how do you use it?
RGB-tonal-histogram

It's easy to set exposure by eye. We've all done it. The problem is that the electronic viewfinder or LCD screen on your camera does not show a 100% accurate representation of what the sensor is recording, and your own eyes may be focused on one part of the image while ignoring another. You could have blown-out highlights or crushed shadows that will only become apparent later when you open the photo in editing software on a computer.

The histogram takes the guesswork out of setting your exposure by showing you a graph of pixels arranged from dark to light. It provides hard data to confirm whether or not you have any areas of the image that are too dark or too bright for the sensor to capture correctly, or what are called "clipped" pixels.

Read more
How to use Snapchat filters
how to use snapchat filters ar

Since 2014, the social media app, Snapchat, has been updating the app with new, fun features. In addition to the drawing tool, users can apply a number of themed stickers to their snaps. Snapchat's most popular feature by far, though, is its filters. With Snapchat's face-detecting lens technology, you can make yourself old, add beauty filters, or give yourself cat ears and whiskers. The list of available filters goes on and on, with more added every day, especially now that users can create and upload their own. Filters are awesome, but they can seem confusing if you don't know how to use them. Luckily, we're here to show you!
Give permission
First things first: In order to access all of Snapchat's filters, you first need to enable them. Head to the app's settings (from the main viewfinder, tap your profile pic in the upper-left corner, followed by the gear icon in the upper-right corner), and then select Permissions (under Privacy). From there, enable the camera permissions. Some filters require geolocation to be enabled, so go ahead and turn that on in your phone's settings as well.
Using filters
Once everything is enabled, you're all ready to start filtering. Head back to the viewfinder and tap the screen. Your camera will take a second to adjust and map your surroundings, then a series of circles will appear to the right of the photo-taking button. Each of the circles contains a little preview of what the filter might be like; tap on one of these to select it (or swipe to scroll through several at once), and the app will apply the filter. The list of filters is refreshed daily, so if you can't find one you like, check back later (some popular choices, though, are semi-permanent).

Some filters are completely autonomous, while some require you to perform an action, like tapping on the screen or looking around in different directions. Snapchat is great at giving clear instructions on how to activate filters, and many of them are downright hilarious. For instance, one filter placed a chicken on the screen, which we could then drag around in 3D space; other filters filled the screen with digital bubbles, or little floating balloons with cat faces.
Lenses
Perhaps more popular and ubiquitous than Snapchat's area filters is the "lens" feature, which uses face detection technology to apply filters to users' faces via the phone's front "selfie" camera. The process here works the same way: Aim the camera at your face (it should be easy, since you'll be displayed on-screen), tap the screen, and wait for the list of filters to appear. Here, you'll find filters that warp your visage in creative ways and filters that add goofy aftereffects.

Read more
How to instal Photoshop brushes (and where to find them for free)
how to install photoshop brushes tutorial featured

Digital artists shouldn’t be limited to a single on-screen cursor any more than physical painters should be restricted to a single paintbrush. Photoshop brushes open up endless possibilities for both photo editing and digital art, from adding texture to creating a digital watercolor from a blank canvas.

Adobe has hundreds of Photoshop brushes that are included with a Creative Cloud subscription, but most of them don’t come pre-installed. Here's how to find and install Photoshop brushes.
How to find free Photoshop brushes

Read more