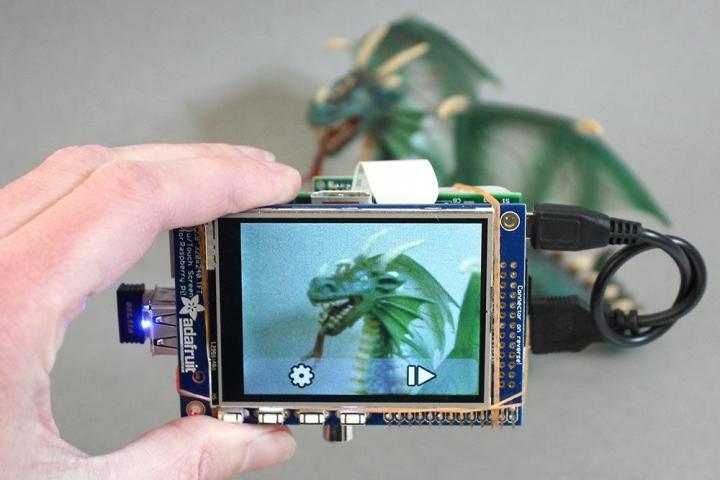
Technology has gotten so easy. Gone are the days when you had to solder stuff together, learn BASIC or DOS prompts, change a video card – if you don’t get any of those references, you’re way too young or we’re way too old. Anyway, part of the fun and frustration of tech of yore was that you learned how the stuff worked by having to do put some DIY muscle into it. Nowadays, when a smartphone or laptop gets too slow, you’d chuck it and get a new one. If you like to put together or take apart tech – specifically a digital camera – Phillip Burgess from Adafruit shows you how you can build a touchscreen digicam using Raspberry Pi and a few components in this video tutorial.
The setup requires a Raspberry Pi motherboard, camera module, USB battery pack, and Adafruit touchscreen module. Burgess provides instructions on how to connect it all together, and it does require some soldering (get that Radio Shack soldering gun out of the attic). Add in a Wi-Fi adapter and you can have images automatically uploaded to a Dropbox account. Other options include adding an infrared board for low-light shooting, self-timer, motion detection, etc.
Check out the first video below, and click here to find out about this DIY camera and everything you need to make one. Of course, our headline is tongue-in-cheek and it’s not a practical camera like the ones you buy off the shelf, but it’s a fun weekend project and you can join the many who are doing some cool stuff with Raspberry Pi. The project will set you back around $126.
If you actually do want to get into digital camera manufacturing, you can learn how to build a fully enclosed point-and-shoot Raspberry Pi camera with the second video from James Wolf.
(Via The Phoblographer/Imaging Resource)


