Parenting is messy and exhausting, yet it’s one of the best reasons to learn photography. Some of the best amateur photographers are parents. They delve into the hobby because they have a new addition to the family, but soon realize that — like many other aspects of parenting for first-time moms and dads — they have no idea what they are doing. Flashes reflect off this and that; shadows appear that never existed before; and skin tones look washed out, blown out, or altogether unnatural. Thankfully, learning how to take kids photos creates a fun, simple hobby you can enjoy without hiring a babysitter — and what parent doesn’t need that? Here’s how to photograph kids.
The gear you’ll need
While some elements of taking photos improve by getting a new camera, you don’t really need to spend a dime if you master the gear that you already have. Sure, upgrading from a smartphone camera to a DSLR or mirrorless variant will offer even more improvement as you learn how to photograph children, but don’t spend the diaper fund on a new camera just yet.
So what do you need, ideally, to take good photos of kids? Kids are fast — if you have a child above crawling age, that’s stating the obvious. But fast subjects need a good autofocus and a fast burst speed. Many of the most memorable kids moments also happen in less-than-ideal lighting conditions — a bright lens will both help in low light, and create that creamy, out-of-focus background.
A DSLR is faster; allows you to do more creative things with your photos by offering infinite control over composition; will have an inherently longer lens; and will take better pictures nine times out of ten, even if you simply use Auto mode and let the camera do the rest. Sure, these cameras are more expensive, but the quality of the images will be worth it for years to come.
Okay: A zoom camera with manual modes or a waterproof camera that won’t be destroyed if your kid drops it in the toilet. Try the Olympus TG-5, Panasonic FZ80 or Panasonic FZ2500.
Good: An entry-level DSLR or mirrorless camera with a kit lens. Try the Nikon D3400 or Canon EOS Rebel SL2.
Better: A mid-level DSLR with a bright prime lens. Try pairing the Nikon D5600 or the Fujifilm X-T20 with a 50mm f/1.8 prime lens.
Best: A speedy shooter with a bright lens. These are pricey, but if you have a big budget, consider the Nikon D500, Canon EOS 5D Mark IV, or Sony A7 III.
Stuck with a smartphone until you’re no longer buying diapers? Download a free photography app with manual modes and follow the next steps to improve your photos with technique, not cash.
Step 1: Get to know your camera
The more you know your camera, the better your pictures are going to be. Do you know how to take several photos in quick succession? How do you pop up the flash? Does your camera offer RAW files for more control over photo edits? Take the time to sit down and notice where all the dials and buttons are and dig through the menu of other settings. For learning how to photograph kids, in particular, you want to find:
Burst mode: This takes several photos in a row instead of a single photo. This is essential for getting the timing just right, from catching a baby’s smile to capturing that first t-ball practice.
Flash: Most new photographers are afraid of flash, but you’ll want to find out where yours is located for low-light shots and even improving outdoor photos in the middle of the day.
RAW: If you have a photo editing program, shooting in RAW is a good idea. If you don’t have the software (or, for many parents, the time) then stick with JPEGs.
Autofocus modes: Take note of where your autofocus modes are. When your kids are moving, you’ll want continuous autofocus or AF-C (Canon refers to this as AI Servo). But on those few occasions when they are actually sitting still, switch to single autofocus, or AF-S (AI Focus on Canon).
Exposure compensation: Photo too light or too dark? Exposure compensation allows you to adjust even before you’ve learned how to use manual modes.
Step 2: Explore shooting modes
Most dedicated cameras have a kids mode inside the different scene options that’s a good starting point. But, to really take control over the images, start digging into manual mode. Don’t try diving in headfirst to full manual. Start with aperture priority mode, usually the A on the mode dial. A small aperture or f-number lets in more light and creates those soft, out-of-focus backgrounds, perfect for blurring that pile of laundry in the background to oblivion. Most of the time, when photographing children, you’ll want a low f-number. To keep more of the photo sharp, like if you are photographing multiple kids in one shot or if the scene is particularly interesting, then you’ll want to use a larger f-number like f/8.
Once you’re comfortable with aperture, dig into shutter speed — higher shutter speeds are best for fast kids, but you’ll need slower shutter speeds indoors and in low light. The general rule is to double the shutter speed to your lens — so, a 50mm kit lens would need to be at least 1/100. Active kids, though, generally need at least a 1/250, so play around with the shutter speed. The final piece of the puzzle is ISO, which is how sensitive the camera is to light. If there’s plenty of light, keep it low, but in the darkest conditions use those high numbers like ISO 1600.
As you shoot in manual, the meter inside the viewfinder tells you if the photo is too light or too dark — essential for when shooting in full manual. If you never make it off aperture and shutter priority modes, don’t sweat it — those modes, mixed with exposure compensation will work fine for photographing kids 95 percent of the time.
Step 3: Zoom
Aperture isn’t the only thing that affects depth of field, or how blurred that background is. Using a zoom lens creates that affect too, and also helps parents capture more candid photos since kids are less likely to notice the camera out when you’re standing farther away.
“A compact camera’s sensor doesn’t allow for shallow depth of field, or any depth of field for that matter,” says Steve Heiner, the Senior Technical Manager at Nikon Inc. “The longer the lens, the higher the focal length, the more this shallow depth of field is possible.”
For example, if you zoom out to the 55mm end of your 18-55mm kit lens that is most likely included with your new DSLR, you can get a very nice softening of the background. If you shoot with the 18mm end of the lens, the background will be in focus. For more fun with depth of field, you can purchase an even longer zoom, such as a 55-300mm lens, to further decrease the depth of field. These telephoto lenses are also wonderful for snapping very candid photos of your kids, who often go into turtle mode or mug for the camera if they know they are being photographed.
Step 4: Find or make great light
Lighting can easily make or break your shot. As you learn, you can make your own light, but as you are starting out, just learn to recognize good light. Outdoors on a cloudy day, taking a good photo is easy. On a sunny day, finding shade is often the best bet. As a newbie, avoid scenarios where the light is coming directly behind the kid until you know flash and manual modes. Once you know how to add a low-powered flash or expose only for the subject, however, backlighting can create beautiful kids photos.
If you are like most parents, you find that taking pictures indoors, especially at night, results in the worst possible shots. That’s when you get the annoying flash reflected off everything from metal refrigerators to glass, not to mention those ghostly faces. First, try keeping the flash off and using a high ISO — push the ISO high enough to get at least a 1/60th shutter speed.
Of course, flashes are our friends, ultimately. They exist for a reason, and one of those is to eliminate those pesky shadows. Say you are on vacation at the Grand Canyon and its high noon. The harsh sunlight coming from directly above makes all your kids look like they have small eyes and long noses due to shadows the sun is casting. Turn the flash on, and it will adjust for the amount of natural light and gently fill in those shadows, making faces appear normal again. Flashes can also help fill in the detail on a face underneath that new cowboy or fireman hat.
Indoors, if you need to use a flash to prevent blur, try adjusting the intensity of the flash by using flash compensation — most of the time, you’ll want a negative number to dial down that flash and get rid of those odd shadows.
An external flash is also a good investment. These flexible flashes can be angled up at the ceiling so that light bounces around and diffuses throughout the room, eliminating that “deer in the headlights” look. “If you don’t want to or can’t afford to buy an ancillary flash, try putting a dry, clean styrofoam coffee cup on top of the flash that is built into your camera. It will diffuse the light just enough. And you can even draw a little smiley face on the cup to entertain the kids,” Heiner says. “Just make sure that the cup doesn’t actually come in contact with the flash, which can melt it and potentially cause damage.”
Step 5: Get down on their level
One of the biggest mistakes adults make when photographing kids is shooting from eye level. The problem is, you’re probably a lot taller than your kid; in every photo, you are looking down on them, which makes them look smaller than they actually are.
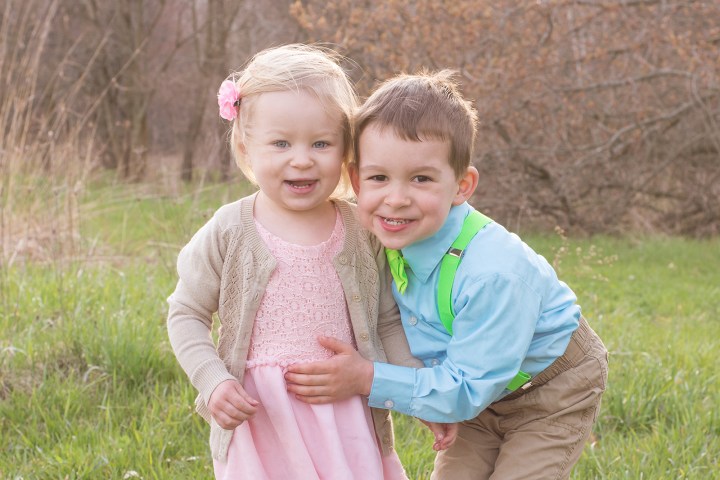
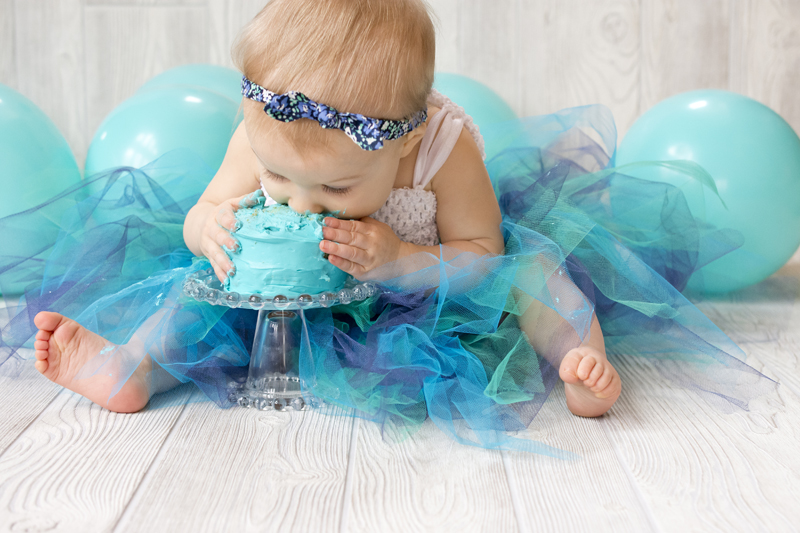
To create more intimate photos that capture the world as a child sees it, adjust your height to match theirs by kneeling, sitting, or, yes, laying on your stomach to photograph that new crawler. By doing this, you’ll get a better look at the child’s face, a better background, and more detail. There are a few occasions where you may want to be taller (or even shorter) than your kid subject, like when you want to show the mess left behind by that first birthday cake smash. But, most of the time, eye level is best. See both photos above as two examples of this.
Step 6: Play
You’ll have more success at photography and better, more creative photos, if you play like a kid while you are shooting kids. Don’t be afraid to get on the ground with your kids or tell them to do fun stuff, like make funny faces, leap, or act silly. When you play with them, they’ll let down their guard. Skip the “say cheese” and get real smiles by photographing while playing. If you’re having trouble getting smiles, recruit help — one of my favorite photos of my son was shot when his grandmother was making him smile by playing peek-a-boo.
Have fun with different composition techniques. For example, off-center portrait shots are usually more interesting than centered ones. Look for those transition moments, where a child is about to do something, like touch a flower or jump off a step. Remember that if you want a kid to smile or look at the camera, silly words and noises are your best friends.
As you compose the shot — or determine what’s left in and what’s left out — focus on getting variety. Of course, take lots of photos including their face and entire body, but don’t forget to get even closer on the details and photograph chubby hands grasping the seashells they just collected or bubbles clinging to their hair at bath time. In the same manner, get some wide shots too. When junior is in college, you’ll probably want to remember that teddy bear he always had, or that your daughter was once able to fit inside a bucket.
Step 7: Earn trust
One of our favorite photographers is Richard Menzies, who takes incredibly candid pictures that are as far from portrait photography as you can get. Menzies, who still prefers film to digital, trained himself to shoot quickly. He never raises the camera to his eye until he was sure of composition and exposure. “My Aunt Belva, by contrast would stand there peering at me through the viewfinder for what seemed hours. As a kid I dreaded having my picture taken, and unfortunately, I still do. Why? I don’t trust the photographer,” says Menzies. “With a digital camera that does most of the work for you, there’s no excuse for standing there holding your camera to your face while your subject grows cranky and the decisive moment melts away.”
Menzies’ expertise, it seems, is crystalizing those captivating moments when kids aren’t “mugging” for the camera. Menzies recommends not making a big production when taking a photograph, but rather, have your camera at hand, ready to go at all times.
Menzies also stresses the economy of frames. With digital cameras, there is no end to the amount of frames you can take, but that doesn’t mean you should subject your kids to endless hours while you try to capture the right shot. “Win your children’s confidence by taking good pictures of them. Don’t exhibit the ones that aren’t good. Move normally, work swiftly and smoothly. And just because your camera will shoot 10 million frames before it’s time to reload, doesn’t mean you need to shoot 10 million frames,” says Menzies.
Step 8: Edit
While it’s always easy to get it right in-camera (especially when you’re a parent and there’s never enough time), a few minor edits can make a big difference, whether that’s using a desktop program like Lightroom or a mobile photo app. Stay away from so-called beauty edits and keep those chubby faces just as you remember them. Focus on improving the photo overall by adjusting exposure, color, contrast and sharpening. Use the crop tool to eliminate any distractions and straighten the shot (since it’s hard to hold a camera perfectly straight).
Just remember, kids are great subjects. Have fun, know your camera, experiment, earn the trust of your subjects, and learn a few basics and you will take some fantastic photos that will definitely worth hanging on the wall.
This story was updated on May 9, 2018 to include additional tips and new hardware recommendation.


