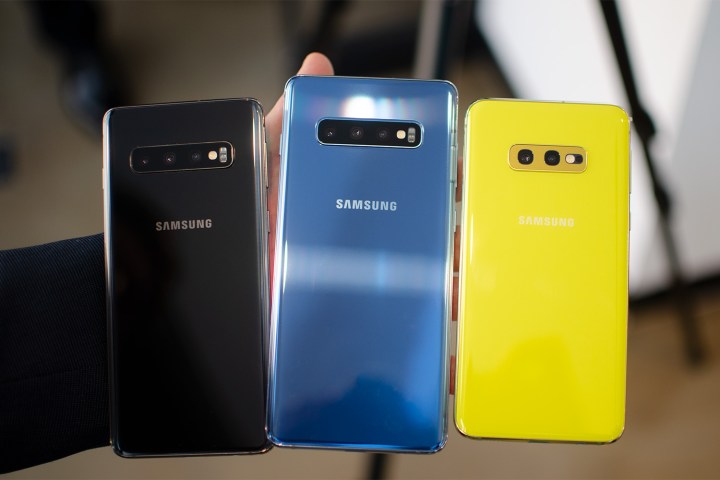
The Samsung Galaxy S10 and S10 Plus top our best smartphones list right now and the Samsung Galaxy S10e is our favorite smaller smartphone. They all have top class displays, plenty of raw power under the hood, and capable camera suites. While they have failed to emerge victorious from our camera shootouts, they have usually picked up at least a few wins against the top competition. For best results it helps to know how to use the camera app and unlock its true capabilities. To that end, we have prepared a feast of Galaxy S10 camera tips for your delectation.
Camera specs

Before we start, it’s worth noting that there are some important differences between the S10 models, but most of these tips should apply to all three phones.
The main camera in the Samsung Galaxy S10 and S10 Plus is a triple-lens shooter that comprises a standard 12-megapixel lens with a variable f/1.5 to f/2.4 aperture, a 12-megapixel telephoto lens with an f/2.4 aperture, and a 16-megapixel ultra-wide-angle lens with an f/2.2 aperture. The Samsung Galaxy S10e makes do with a dual-lens setup, dropping the 12-megapixel telephoto lens. You’ll also find support for HDR and optical image stabilization (OIS). The OIS is present in each of the 12-megapixel lenses, and the telephoto lens in the S10 and S10 Plus allows for 2x optical zoom.
All three can record 4K UHD video at up to 60 frames-per-second (fps), 1080p at up to 240 fps, and 720p at up to 960 fps, which Samsung calls Super Slow-mo. You’ll also find support for HDR10+.
Moving around front, the Samsung Galaxy S10 Plus has an edge with a dual-lens setup that pairs a 10-megapixel lens with an f/1.9 aperture and an 8-megapixel lens with an f/2.2 aperture to capture better depth data. The S10 and S10e have the solitary 10-megapixel lens. The front-facing cameras can also record 4K video up to 30 fps.
Getting started

By default you’ll find the camera icon at the bottom right of your screen. If your S10 is unlocked you can simply tap it to launch the camera. If it’s locked, then you can tap and drag the camera icon into the center to launch the camera app.
You can also quickly press the Power button twice to launch the camera app from anywhere, locked or unlocked. This quick launch function should be on by default, but if it’s not then tap the gear icon at the top left in the camera app to open the settings and scroll down to toggle on Quick launch.
When the camera app is open you can quickly press the Power button twice to switch between the main and front-facing cameras.
The camera app
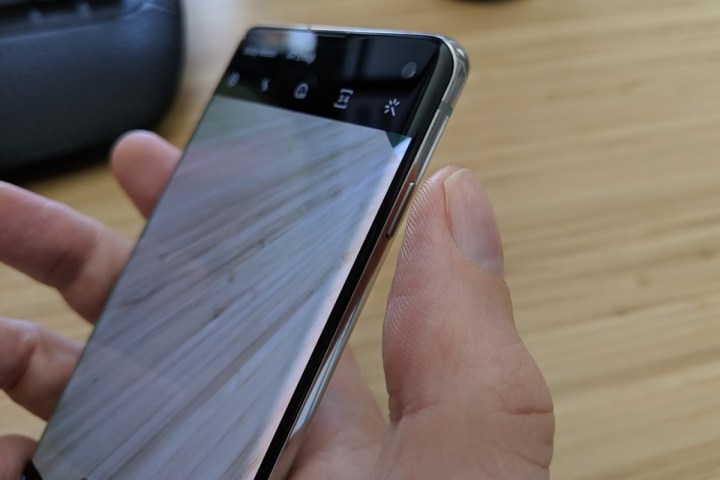
While the Samsung Galaxy S10 camera app is easy to use, there’s a lot going on, so it can take some time to get to grips with. You can swipe through the different camera modes listed on the right, or along the bottom when you hold the S10 in portrait view. It’s worth noting that swiping up or down in landscape view, or right or left in portrait, anywhere on screen will cycle through your available modes.
You can switch between the front and back cameras using the two squared off arrow icons that appear next to the big shutter button. The last photo you took appears on the other side and you can tap it to open that photo in the Gallery app.
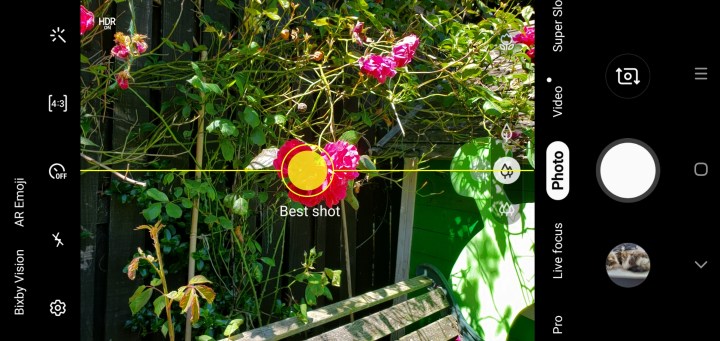
On the left hand side, or at the top of the screen, you’ll find a row of white icons and right at the top there’s the option to skip into Bixby Vision or make your own AR Emoji. Both are a little gimmicky, but worth trying out. You can use Bixby Vision to identify objects and shop for them, try on make-up, and more. The AR Emoji is supposed to create a cartoonish version of you that will animate along with your facial movements and speech, but in our experience the chances of it actually looking like you are slim.
The row of icons below from left to right is the settings, the flash (which we definitely recommend leaving off), the timer, the aspect ratio, and the wand at the end enables you to apply a range of 12 live filters from warm to black and white, or switch on Beauty mode, which enables you tweak your facial features.
There are an awful lot of modes to choose from in the camera app and there may be a few in there that you don’t intend to use. It’s probably a good idea to slim them down and clear out some of the clutter. You can just toggle off anything you don’t think you’re likely to need and you can always turn it back on again if you want to. You can edit the modes that appear in the camera settings via Camera modes > Edit modes. Simply tap to turn off anything you don’t want to appear. You can also change the order by tapping and dragging a mode up or down the list.
How to use the wide-angle or telephoto lens
By default you’ll start on the main camera lens, but you can change that via the tree icons on the right. The two trees in the middle is your standard lens. Tap the three trees icon to switch to the wide-angle lens and you can fit in more of the scene before you. You can tap the single tree icon to switch to the telephoto lens. You can also zoom in and out by placing a thumb and finger on screen and then swiping them apart to zoom out or together to zoom in; you’ll see a counter appear on screen to show you the zoom level as you do this.
How to use Scene Optimizer
Scene Optimizer uses artificial intelligence to automatically detect scenes from glorious sunsets to chubby babies and it adjusts the camera settings to try and produce the best possible photo. You can turn it on and off quickly via the blue swirl icon on the right in the camera app. You can also access it via the camera settings and tap on it to turn various Intelligent features on or off. We suggest leaving it on and letting it do its thing, but you can always test it by taking the same photo with it on and off. It tends to help make images pop, but it can tend towards over-saturation.
Like previous Galaxy S phones the Scene Optimizer can detect Food, Animals, Sky, Watersides, Snow, Portraits, Landscapes, Mountains, Street scenes, Birds, Flowers, Greenery, Beaches, Night scenes, Backlit, Indoor scenes, Trees, Sunrises and sunsets, Waterfalls, and Text. The Galaxy S10 range can also detect Clothing, Vehicle, Face, Drink, People, Cat, Shoe, Dog, Stage, and Baby.
How to use Shot suggestions

One of our favorite features in the S10 camera app is Shot suggestions. It will show you how you can improve your composition by displaying a horizontal line to match and a specific spot that should offer the Best shot. All you need to do is line up accordingly — the line and Best shot spot will turn yellow and you can snap a superior photo. You can toggle Shot suggestions on in the camera app settings. It’s not always perfect, and you may not want to have it turned on all the time, but it can be genuinely helpful.
How to use Pro Mode

If you want to dig really deep and unlock the full range of camera options then you need to try out Pro Mode. Swipe to Pro Mode and you’ll open up a wealth of new features, but it’s going to take some photography knowledge to get good results in here. We’ll assume you’re holding the S10 in landscape view to discuss this mode. The grid of yellow squares shows you the autofocus area and you can change it by tapping the grid icon at the top left, there’s a metering option below that. Over on the right you’ll see a whole range of new options so that you can adjust white balance, ISO, shutter speed, focus, exposure, and more.
Another important thing you can do in Pro Mode is save your photos in JPEG and RAW formats. With Pro Mode activated, open up the settings via the gear icon and tap Save options then toggle on RAW copies. Professional photographers will be able to work editing wonders on RAW files, but beware because they do take up a lot more space than JPEGs.
How to use Live Focus
Samsung’s version of Portrait Mode is called Live Focus and it enables you to add a blur effect behind your subject, emulating the bokeh effect that professional DSLR cameras produce. It’s especially good for taking pictures of people or focusing in on specific subjects. Pick your subject and drag the bar below to change the level of blur. You can also choose to tweak the blur after taking the shot by opening the photo in the Gallery app and tapping on Change background effect at the bottom. In typical Samsung style, you don’t just get a simple background blur option, you can also choose to create Spin, Zoom, or Color point effects. The Color point option is our favorite as it allows you to keep the subject in color and have the background in black and white.
How to shoot great video
The Galaxy S10 is capable of capturing some excellent video, but there are a lot of different options to be aware of and not everything can be used together. The default settings are probably going to be fine for most people, but if you open the camera settings, you can change a bunch of things. The video size defaults to 1080p, but you can switch all the way up to 4K at 60 frames-per-second if you want to — just remember that videos with those settings will take up a lot more storage space.
If you’re playing your home videos back on a big TV and you have something that supports HDR10+ then you should toggle it on. You’ll find the option in the camera settings under Advanced recording options. Don’t be tempted to use this if you don’t have an HDR10+ compatible device because it won’t look good.
You can turn on the Super steady option by tapping the hand icon or dip into the settings and toggle on Video stabilization. It should be on by default, and you’ll want it on because it will smooth out any wobbles or shaking. However, if you want to track a moving subject with Tracking auto-focus then note that Video stabilization will be turned off automatically.
It’s also worth noting that if you jump up to 60 fps, then Tracking auto-focus and Video effects won’t work, and if you jump to 4K at 60 fps, then Video stabilization won’t work.
Samsung also offers Hyperlapse, Slow motion, and our favorite, Super Slo-Mo. It takes some practice to get good results with it and good lighting is essential, but it’s a lot of fun and we have a Super Slo-Mo guide to help you.
If you haven’t sated your thirst for features and you want to go beyond the camera, then check out the key settings you should change and our top Galaxy S10 tips for more.


