As one of the most popular video streaming platforms online, if you want to have your vlog, comedy sketch, or music video seen by someone, getting it on YouTube is a must. Those new to the streaming scene may be wondering how to upload a video to YouTube. Here’s how in just four easy steps.
Note: For this guide, we will assume that you’ve already made your YouTube/Google account. While those starting from scratch will need to do so, there are many elements involved in setup and customization that aren’t covered by this guide.
Step 1: Sign in to your account

Head to the YouTube homepage or YouTube Studio and click the Sign In link in the top right corner. If you have multiple accounts associated with the device you’re using, choose the appropriate one. Enter your password, and you’ll go back to the main YouTube page.
Things may look a little different in terms of video recommendations, but don’t fret — you’re now well on your way to uploading your first video.
Users of the YouTube Android mobile app should log into their accounts, and tap the Create icon (a plus sign within a circle). Then: Select Upload a Video. Choose a video from your device. Edit your video and fill out the form on the next screen. Select the blue Next button. Choose your audience settings from the two drop-down menus. Then select the blue Upload button.
Apple iOS users should: Tap the Create icon. Choose the option that lets you upload a video from your device. Edit your video as desired and then tap Next. Fill out your video’s information. Choose your audience settings. Then select Upload.
Step 2: Click the Create button
The next step is even shorter than the first. Click the Create button — it’s located in the top right-hand corner represented by a camera with a plus sign — then select Upload Video. That will take you to a dedicated upload page, which will take you through the process of uploading your upcoming viral sensation.

Step 3: Upload your video and choose your video settings

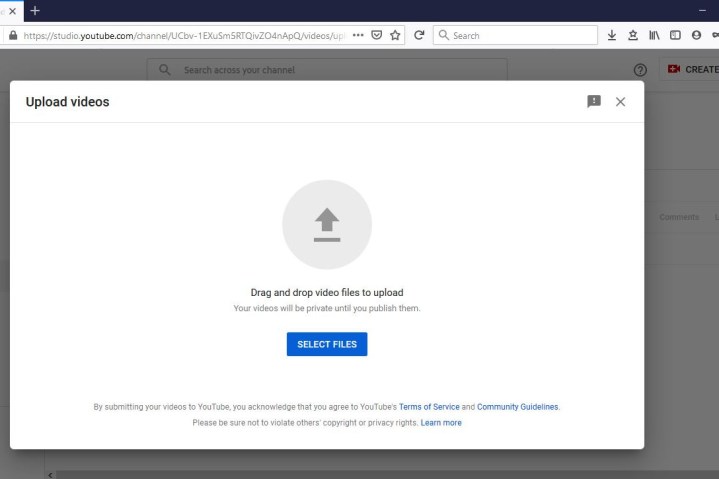
The Upload Videos page lets you select the video file from your computer (by clicking the Select Files button) or drag-and-drop to upload them. Once you’ve uploaded your files, YouTube gives you a few different options to choose from when it comes to customizing your video, and they’re all worth considering.
After selecting the video you wish to upload, you’ll continue to a new screen called Details. Here you’ll fill out the details of your video and begin choosing some options. The Details section is where you’ll name your video, write a description for it, choose a thumbnail photo for it, and you’ll also get to choose your audience and age restriction options. Once you’re done here, click Next.
You can choose to add optional elements to your video, like end screens or cards, under the Video Elements section. These kinds of elements can assist in promoting your other content. Click Next when you’re done choosing your elements.
The Visibility section allows you to choose when your video gets published and who gets to watch it. Under Save or Publish, you can choose from three visibility options: Private, Unlisted, or Public. Private means only you and the people you choose to share it with can see it. Unlisted means people can watch it if they have the link to it. It won’t just pop up on the site. Public means anyone can watch it. You can also choose Schedule to choose a date for when you’d like the video to go public. Once you’ve selected your options, click on the Save or Publish button to finish (what this button will say depends on your visibility settings).
Step 4: Video management
After you’ve waited for around a minute, you’ll notice your loaded Dashboard. Select Content from the menu on the left side of your screen. Doing this will enable you to view every video you’ve uploaded into your library. You’ll also be able to observe the number of views and a variety of other helpful stats for each video. Locate the video you want to start editing and click the checkbox on the left of it.
From here, select Edit. You’ll see a menu pop-up, including over 13 editing options to apply to various elements of your video. You can change the title, the summary description, tags, and even its public settings.
In addition, you can also select Add to Playlist or More Actions. Add to Playlist lets you add your selected video to one of your current playlists, or you can simply make a new playlist for your chosen video. Clicking More Actions allows you to either download your picked videos or remove them permanently.

That’s really all there is to it, folks. Now you know how to upload a video to YouTube in less than five easy steps.


